
Warning: This article mentions domestic abuse.
You may call your site audience your “users,” but ultimately, they’re just people. Imperfect people with imperfect lives — sometimes to an extreme degree.
During the COVID-19 pandemic, there was a massive rise in domestic violence. This type of violence can take many forms, including technical abuse, where technology is used to control, harass, or intimidate someone. It can look different in various situations, from an abuser constantly sending phone or text messages to controlling the sites or devices their partner can access. Even sharing a store rewards phone number can have unintended consequences. The range of opportunities for abuse is endless.
In the book Design for Safety,” author Eva PenzeyMoog cites an NPR survey that found “85 percent of shelters they surveyed were helping survivors whose abusers were monitoring their activity and location through technology.” This is an alarming statistic. Domestic violence prevention isn’t something that is taught in schools — how would people know how to protect themselves before it’s too late?
As professionals creating digital products, it’s our responsibility to create “for good.” How can we be advocates for safety in design? According to Design for Safety, as an advocate, you must “support vulnerable users to reclaim power and control.” A website could have an easy-to-use interface but still provide pathways for users to experience abuse from domestic perpetrators. Ultimately, this leaves victims vulnerable while giving them a false sense that they have more control than they genuinely do.
During the website creation process, you should aim to design for safety. A key step is to identify “ways your product can be abused, then ways to prevent that abuse.” For example, to help address any abuse or harassment captured while on a call, Google Meet has the function to “report abuse.” You can attach a video clip when you report, and they will investigate and then take action on their end. By proactively planning around safety, your organization can deepen trust with users while doing your part to prevent domestic violence.
Case Study
This past year, Oomph worked with a nonprofit website, which helps the general public understand their legal issues, to perform a user experience discovery and redesign. The site provides individuals with low incomes and limited English with local laws written in plain English. Users visit the site for legal information on various topics, including evictions, government benefits, domestic violence restraining orders and family law. A subsection of the audience uses the website to look for resources dealing with domestic violence.
When designing for this audience, we needed a way to support users who may need to exit a page quickly if they are interrupted by a potential abuser while scrolling through sensitive information, such as divorce or domestic violence resources. The site had previously utilized an “Escape” button on pages that dealt with those sorts of topics. When approaching the redesign, we wanted to ensure this button would always appear but wouldn’t interfere with other audiences, such as someone looking for information about traffic tickets. It had to walk a fine line between in-your-face and too subtle to be helpful to ensure users could see and interact with it.
When dealing with “trauma-informed” design, designers must “prioritize comfort over technological trends” (Design for Safety). Our challenge was amplified by a lack of standards for a quick exit button’s function, especially for a site with multiple audiences. Since these buttons are a relatively new best practice and little research on them exists, we were careful in our strategic approach. A quick exit button is not ingrained in a user’s mental model, making its intended action new to most people. Those who feel they might need it have to recognize its function as soon as possible.
Approach to the Quick Exit Button
While designing the quick exit button, we considered its placement, colors, and typographic style to ensure that:
- The button was easy to understand and used by people who needed it,
- The language was not retraumatizing,
- The button wasn’t so big and distracting that it took away from the overall experience of the site for those who didn’t need it, and
- The button’s position was easily accessible on a range of device sizes and types.
Our first wireframe called the button “Quick Exit.” When we tested the prototype, all five participants did not understand what the exit button meant. This emphasized how important the language on the button is. For those who have dealt with domestic violence, even the word “escape” could be harmful to hear. Additionally, since audiences view the website in different languages, we wanted to ensure that the button’s translation would not adversely affect the layout.

On our next iteration, we tried using the term “Exit” with the icon globally known for “external link.” But this still wasn’t clear enough for our users: Where would the exit bring you? To a page called “Exit”?
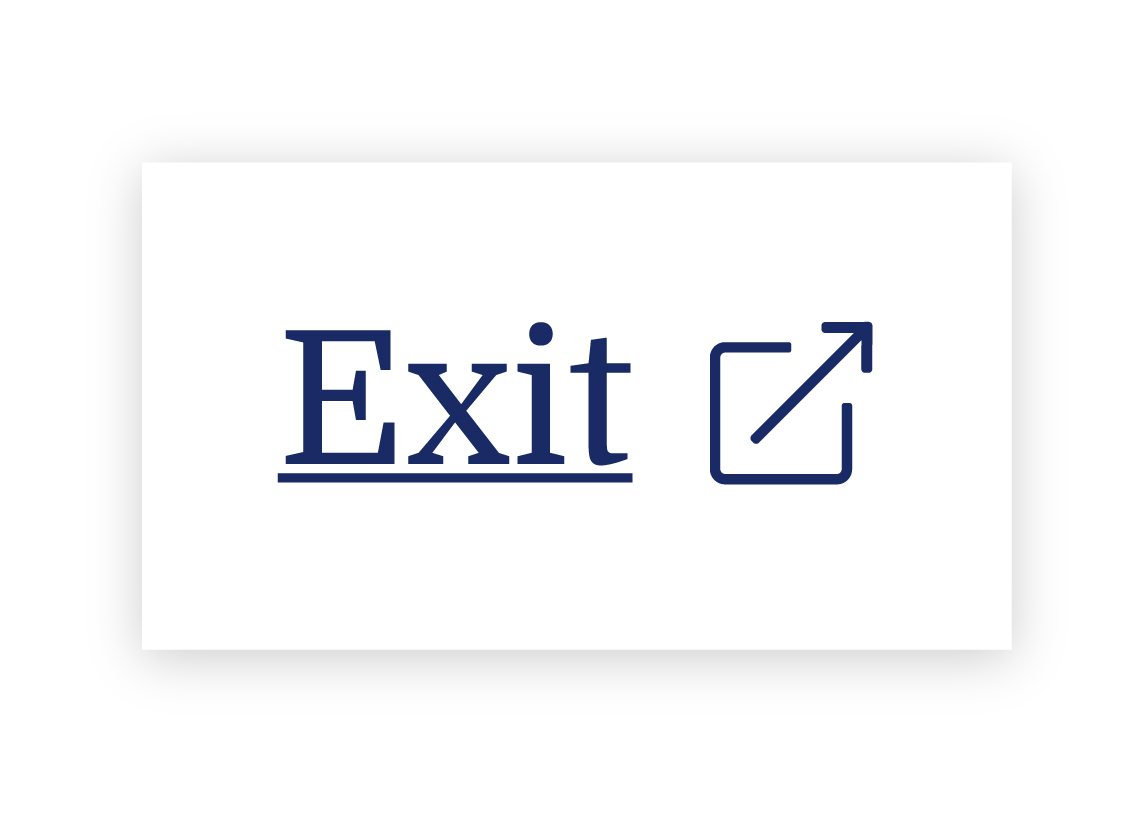
We needed to explain exactly what the button did, so we opted to use the universal external link icon with “Exit Site” as a label to best communicate what the button would do. Although it does not describe where you will end up, it clearly explains that you will leave the website.

To further help users understand what the button was for, we then created a pop-up at the start of the user’s journey that educates people on the button’s purpose:
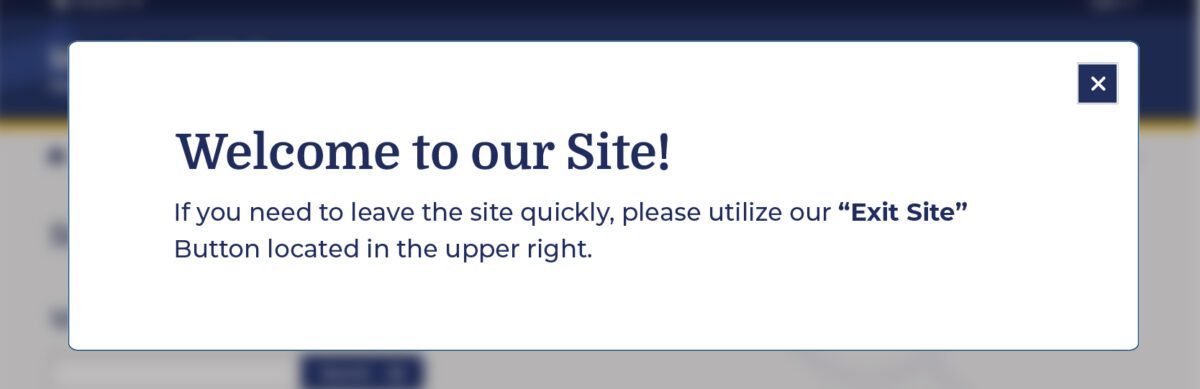
Overall, there was a delicate balance we had to achieve in managing all audiences that typically view the site. We wanted to ensure that we were educating all users but not preventing users from getting help for other topics, such as information about the right to an education or disability. The pop-up, however, had additional considerations we needed to weigh as well: What if their abuser sees it upon landing? What if the user who needs it ignores it?
An alternate approach focused more on domestic violence victims is the California Victims Resource Center’s (CVRC) website, 1800victims.org. When landing on the site, visitors are first educated with a pop-up, which includes reading the website’s Terms of Use and agreeing to the terms before they can enter.
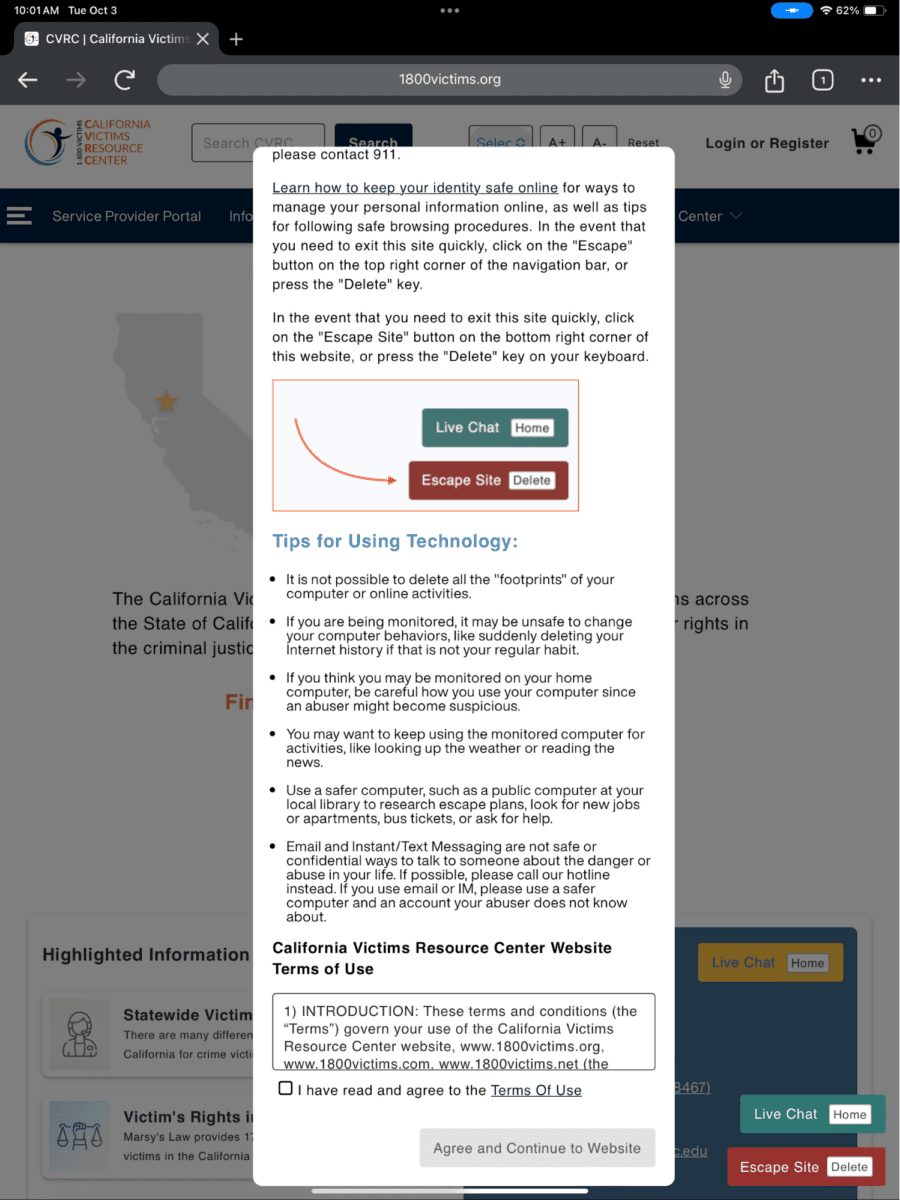
Additionally, when the user clicks the escape button (or uses the keyboard short-cut “Delete”), they are brought to a new tab that displays ABC News. The 1800victims site is changed to Netflix — with all traces of the CVRC gone. According to Columbia Health, this follows best practice because “a blank history can raise suspicion from your abuser.” This would be the safest approach for users.
To give back to the open-source community, the Oomph team turned our approach for this client into the “Quick Exit” Drupal Module. If you would like to add this kind of functionality to your own Drupal website, the module is a great place to start.
Designing for Safety
We must consider how users dealing with domestic violence may feel when they are visiting a site with sensitive content. By including information to educate users upon landing, we can help more people understand how to use a quick exit button if they find themselves in a situation where they need to swiftly leave a website. As an advocate for user safety and domestic violence prevention, you can proactively create a safety net for others by starting to review your work through the lens of how it may be abused prior to releasing it into the world.
This article is just one look at how organizations can design for safety using a quick exit button. By talking about these issues and advocating to protect users in your own design process, we can all take a step toward helping prevent domestic violence. Even if one person is helped or informed by Oomph’s quick exit button design on the website, it will be a success in our eyes.
Need help incorporating safety-focused design into your website or mobile apps? Let’s chat about your needs.
If you or someone you may know is struggling with domestic abuse, please visit or call the National Domestic Violence Hotline at 800-799-7233. For further reading on creating digital products with a safety mindset, we recommend Eva PenzeyMoog’s book Design for Safety available from A Book Apart.
Feel like you’re seeing a lot more website pop-up banners these days asking about your cookie preferences? Those cookie banners are here to stay, and they’re a vital part of compliance for websites of all sizes.
As global standards for consumer privacy and data protection continue to climb, businesses are burning more time and resources to keep up. One VentureBeat article pegged the cost for a business of maintaining data privacy compliance at an eye-popping $31 million — and the costs of non-compliance can be even higher. Failing to stay on top of this complex patchwork of regulations can trigger real consequences, from steep fines and penalties to the indirect costs of reputational harm and lost business.
Cookie consent is one part of a holistic data privacy strategy — and an increasingly important one. Global privacy laws, such as the General Data Protection Regulation (GDPR), California Consumer Privacy Act (CCPA), and Brazil’s General Data Protection Law (LGPD), require companies to inform visitors about the data collected on their website via cookies and provide them with granular choices about what they’re willing to share. Cookie consent management solutions help users manage cookie preferences when they enter your site, presenting a banner that informs users about how cookies are used and letting them decide which information (if any) they want cookies to collect.
Cookie consent management solutions are rapidly evolving to keep up with changing data privacy standards. CookiePro is a solution from OneTrust designed specifically for small to medium businesses, offering a more automated way to ensure website and mobile applications stay compliant with cookie consent and global privacy regulations. At Oomph, we’ve helped several clients integrate CookiePro into their sites in recent months and think it’s on track to become an industry standard for cookie consent management.
For organizations that are already juggling multiple site integrations, does it make sense to add another? To answer that, let’s take a look at why cookie consent matters, how a tool like CookiePro can help, and if it’s right for you.
Why Do I Need a Cookie Consent Solution?
To comply with privacy laws and provide a transparent experience that builds trust, many website owners are rethinking how they manage compliance. Adding a cookie consent tool to your website can improve the experience for you and your users.
Ensure Compliance
Not taking data privacy seriously can cost you. In December 2022, Meta (the parent company of Facebook) agreed to pay $725 million to settle several class-action lawsuits that found Facebook had let third-parties access users’ private data and their friends’ data without user permission. Oracle has been sued for collecting 4.5 billion personal records from consumers who have specifically opted out of sharing, and Starbucks is potentially facing a lawsuit for continuing to “track customers ‘after they’ve declined all but required cookies.’”
While big-name companies get most of the bad press around data privacy, you don’t have to be a global enterprise to face similar consequences. In 2022, the total value of settlements for class-action lawsuits set a new record at $63 billion — and data breach and privacy class action settlements were among the top 10 settlement categories. Instead of risking a costly settlement, a much less expensive approach is to invest in a solution to help manage the work of compliance.
Build Trust
Beyond protecting your organization from legal action, demonstrating that you care about compliance helps your business build trust and long-term relationships with users. Data privacy is becoming more important to consumers of all ages, with 74% of people ranking data privacy as one of their top values.
A cookie consent solution lets users know that they’re in charge of their own data. It clearly discloses which information your business collects and uses, putting the power in their hands to control the data they share. If users want to change what they’re comfortable sharing later, they can easily update their settings. That level of transparency helps set the tone for your customer interactions, turning users into loyal brand advocates.
Optimize Efficiency
If your website serves users in multiple states or countries, keeping up with the patchwork of state, federal, and international laws is virtually impossible without software. Eleven states have unique data privacy laws in place right now, and 16 states introduced privacy bills during the 2022 to 2023 legislative cycle.
Factor in international regulations like GDPR, and it would take more hours than there are in a day to curate the individual preferences of your customer base. Plus, which of your team members is watching in case any regulations change? The most efficient approach is to use an automated cookie solution to curate consent requirements based on the user’s location and more.
What Is CookiePro?
Developed by OneTrust, which offers more robust data privacy solutions for enterprises, CookiePro started as a product in the OneTrust platform. After recognizing the need among small and medium businesses for a turnkey consent tool, OneTrust spun off CookiePro as a standalone solution.
CookiePro offers plans starting at around $40 per month, making it a budget-friendly alternative to enterprise solutions like OneTrust (or the cost of a lawsuit settlement). CookiePro comes with core compliance features like user-level consent management, acceptance customization, data mapping and recordkeeping, support for over 250 user languages, and additional security features.
After helping several of our clients implement CookiePro, there are a few key features that stand out for us:
- Easy installation: It just takes a few minutes to add a snippet of code to your website to enable CookiePro. It’s compatible with Drupal, WordPress, and other major site platforms.
- Automated cookie blocking: CookiePro’s auto-blocking tool scans your website to identify third-party tracking technologies, categorizes the cookies, and automatically blocks all cookies until users have given consent.
- Robust customizations: You can tailor your CookiePro banner to match your branding by customizing colors, content, and consent language. CookiePro also allows you to customize the user experience by choosing your consent approach and giving users granular control over their cookie settings.
- Upgrade path: Whether you have a small site or one with hundreds of thousands of visitors, CookiePro can support growing business needs. If you find that you need more support or functionality, you can upgrade to OneTrust’s Trust Intelligence Platform to unify all your data privacy management activities.
- Tag management system integrations: You can integrate tag management systems with your cookie consent solution if you use analytics and other platform tags on your website. CookiePro has integrations with many major tag management systems, including Google Tag Manager and Tealium, so you don’t have to change your current setup.
Beyond CookiePro, there are a growing number of other cookie consent solutions on the market, such as Termly and Cookiebot by Usercentrics. The right choice for you will depend on your existing tech stack, budget, and goals — the most important step is to put something in place to protect yourself and your users.
Where Should I Start?
Taking a proactive approach is key to ensuring data privacy for your users and avoiding costly consequences. Educate yourself on the different regulations and requirements, figure out the gaps in your compliance approach, and invest in tools that can help reduce risk and manual effort for your team.
Feeling overwhelmed or need a fresh perspective? Oomph’s accessibility and compliance audit is a great place to start. We can help you go beyond cookie consent to meet Web Content Accessibility Guidelines (WCAG), Americans With Disabilities Act (ADA), and other regulatory standards, helping you mitigate risk and deliver on user expectations. Reach out to us to schedule your site audit.
What’s been holding you back from migrating your website off of Drupal 7?
Maybe your brand is juggling other digital projects that have pushed your migration to the back burner. Maybe the platform has been working well enough that migration isn’t really on the radar. Or maybe (no shame here) you’ve been overwhelmed by such a massive undertaking and you’re feeling a little like Michael Scott:

“I don’t wanna work. I just want to bang on this mug all day.”
We get it. Whether you’re migrating to a new version of Drupal or a different platform, it’s a time-consuming process — which means now is definitely the time to get started.
While the Drupal Security Team recently announced it would extend security coverage for Drupal 7 from November 2023 to January 2025, those extra 14 months are ideally the time to plan and execute a thoughtful migration. Giving yourself ample time to plan for life after Drupal 7 is something Oomph has been recommending for a while now, and we’re here to help you through it.
3 Reasons To Start Your Drupal 7 Migration Now
1. Because Migration Takes Time
Migrating your site isn’t as simple as flipping a switch — and the more complex your site is, the more time it can take. Imagine two boats changing course in the water: It takes a massive container ship longer to turn than a small fishing boat. If your site is highly complex or has a lot of pages, it could easily take a year to fully migrate (not including the time it takes to select a partner to manage the process and kick off the work).
Even if your site isn’t so robust, you’ll do yourself a favor by building in a time buffer. Otherwise, you could risk facing a security gap if you run into complications that slow the process down. Some of the major factors that can impact timeline include:
- Developing a new site theme. The switch from the PHP Template Engine in Drupal 7 to Twig in Drupal 8 and above means you’ll need to rewrite your custom theme if you’re planning to upgrade to Drupal 10 — even if you’re not planning to redesign your site.
- Navigating custom code. If your current site relies on custom code, those modules will need special attention during the migration process.
- Migrating community-contributed modules. One of the best things about Drupal is the fact that it’s open-source, which means community members are constantly contributing new modules and features that anyone can use. While many Drupal 7 modules have a simple migration path to Drupal 10, not all do. Certain modules, including Organic Groups, Field Collections, and Panels, will need to be reviewed and migrated manually. Even if a module has a set migration path, it can be quicker to migrate them by hand (Webforms and Views are two good examples).
- Making other upgrades. You know the old saying, “Never let a good migration go to waste?” (OK, we made that up.) Still, a migration is a smart time to tackle other changes to your site, from updating your information architecture to modernizing your design. If you’re planning on a more holistic site update, there’s even more reason to start now to make sure your project is wrapped before the end of 2024.
2. Your Site Performance Is Less Than Ideal
Yes, Drupal 7 sites technically have security coverage until 2025. But if you’re still on Drupal 7, you’re missing out on the best that Drupal currently has to offer.
First, Drupal 7 is not fully compatible with PHP 8, a new and improved version of PHP that many websites are built on today. While Drupal 7’s core supports PHP 8, some contributed modules or themes on your site might not, which could create hiccups in your site performance.
In addition, the Drupal community is constantly putting out new features that aren’t available on Drupal 7. Some of the most exciting ones include:
- Layout builder, a visual design tool that makes it easier for content editors to build web pages and gives designers more room to flex their creative muscles.
- Workspaces, an experimental feature that allows users to stage content or preview a full site by using multiple workspaces on a single site.
- Better accessibility and responsive design to create genuinely useful experiences for all site users.
- API-first architecture and decoupled options to make it easier to integrate your site with any other tools or functionality you need.
- Twig, a templating language from Symfony that lets you write concise, readable templates that are more friendly to web designers.
- SaaS offerings like Acquia’s Site Studio to build beautiful pages more easily.
Sticking with Drupal 7 means not only missing out on this new functionality, but also on support from the Drupal community. Interest and activity from web devs on Drupal 7 continues to wane, which means your team may find it harder to get help from others to deal with bugs or other issues. You’re also likely to see fewer new features that are compatible with the older version – so while other sites can keep up with the evolving digital landscape, a Drupal 7 site is increasingly stuck in the past.
3. To Save Your Team’s Sanity
Odds are good that if your site is still running on Drupal 7, your team is already having trouble trying to make it work for your needs. Starting your migration now is key to getting your site running as smoothly as soon as possible — and sparing your team from unnecessary misery.
Consider these pain points and how your team can address them in your migration:
- Is your team frustrated with aspects of Drupal 7 that limit your site’s functionality?
- Is technical debt making your site maintenance more complicated, expensive, or both? Could it be affecting your hosting or vendor costs?
- Is your team struggling to find support or third-party integrations that work with the platform?
- Are they holding off on major new initiatives because the site can’t support them?
Options for Life After Drupal 7
Now that Drupal 7 is officially winding down, what’s next for your website? Deciding whether to go Drupal-to-Drupal, Drupal to another CMS, or a different route entirely depends on your technical needs and resources.
Drupal 10
If Drupal 7 has served your team well in the past, then Drupal 10 is the logical choice. The newest version of Drupal is ideal for more complex sites with extensive content modeling, varying user roles, and workflow requirements. To make things easier, you can leapfrog over Drupal 8 and 9 and migrate your Drupal 7 site directly to the latest and greatest version.
Many of our clients at Oomph are going this route, since Drupal 10 offers both a range of new features and familiarity for Drupal-versed teams to cut down on the post-migration learning curve.
WordPress or Another CMS
Not sure if Drupal 10 is the best fit? If your site is on the small side or if you don’t require lots of functionality, then Drupal may be more than you really require.
In that case, moving off of Drupal altogether might be in your best interests, helping you streamline your ongoing development needs and reduce maintenance and hosting costs. Here are a few alternatives for Drupal 7 users looking for a less robust platform without sacrificing a great web presence:
- WordPress
- Squarespace
- Wix
- Consider a headless CMS, supported by a decoupled framework such as Gatsby or Next.js.
An Internal Stopgap
Depending on your organization, now might not be a good time to migrate or rebuild your site. This is especially true if you’re already invested in an ongoing site redesign or rebuild. If you’re still trying to figure out your digital future, consider temporary measures you can take to stay protected once Drupal 7’s security coverage ends.
One possibility to consider is rolling up your site under another digital property in your organization. Even if it’s only an interim solution, it can help you buy time to make the best long-term plan for your website. Another option would be to develop a smaller static website with a refreshed design that would eventually be replaced with the upgraded CMS.
Tips for a Successful Migration
As your site’s technical foundation, Drupal delivers plenty of horsepower. However, the digital home you build on that foundation is what really counts. It’s crucially important to make sure all the pieces of your site work together as one — and a migration is a perfect opportunity to assess and optimize.
Over time, websites tend to accumulate “cruft” — the digital equivalent of dust and cobwebs. Cruft can take many forms: outdated, unnecessary, or poorly written code; deprecated site features; or obsolete or outdated content, files, and data. Whatever cruft exists on your site, migration is a chance to do some digital spring cleaning that can improve site performance and reduce maintenance time.
Beyond digital hygiene, evaluating each element of your site strategically can help you get the greatest business value from your migration.
- Information architecture: How easy is it to navigate around your site? Do your sitemap and information architecture still reflect your offerings and user needs accurately?
- Content: Does your site’s content still engage your audience and support business goals? Think about the impact of any changes to your information architecture: Would they require you to add, change, or remove content?
- Design: Will your existing site design work with the CMS you’ve chosen? Does it need updates to meet current standards for UX, accessibility, and responsiveness?
- Integrations: Should you add or remove any APIs or integrations? Keep in mind that many features not available in Drupal 7 are now built into the core of Drupal 10 or are available as contributed modules, so you may be able to optimize some of your site’s key features.
No matter what you plan to tackle alongside your migration, it’s a big project. An experienced guide can make all the difference. Our team of die-hard Drupal enthusiasts has led many Drupal-to-Drupal and replatforming projects for clients, including complex e-commerce and intranet sites. For us, a successful migration is one that’s grounded in strategy, follows technical best practices, and — most importantly — can support and evolve with your brand over time.
Need a hand deciding which route to take for your Drupal 7 migration? We’d love to talk.
Finding yourself bogged down with digital analytics? Spending hours just collecting and organizing information from your websites and apps? Looker Studio could be the answer to all your problems (well, maybe not all of them, but at least where data analytics are concerned).
This business intelligence tool from Google is designed to solve one of the biggest headaches out there for marketers: turning mountains of website data into actionable insights. Anyone who’s ever gone down the proverbial rabbit hole scouring Google Analytics for the right metrics or manually inputting numbers from a spreadsheet into their business intelligence platform knows that organizing this data is no small task. With Looker Studio, you can consolidate and simplify complicated data, freeing up more time for actual analysis.
With so many customizable features and templates, it does take time to set up a Looker Studio report that works for you. Since Google’s recent switch from Universal Analytics to Google Analytics 4, you might also find that certain Looker Studio reports aren’t working the way they used to.
Not to worry: Our Oomph engineers help clients configure and analyze data with Looker Studio every day, and we’ve learned a few tips along the way. Here’s what to know to make Looker Studio work for your business.
The benefits of using Looker Studio for data visualization and analysis
Formerly known as Google Data Studio, Looker Studio pulls, organizes, and visualizes data in one unified reporting experience. For marketers who rely heavily on data to make informed decisions, Looker Studio can save precious time and energy, which you can then invest in analyzing and interpreting data.
Key benefits of using Looker Studio include:
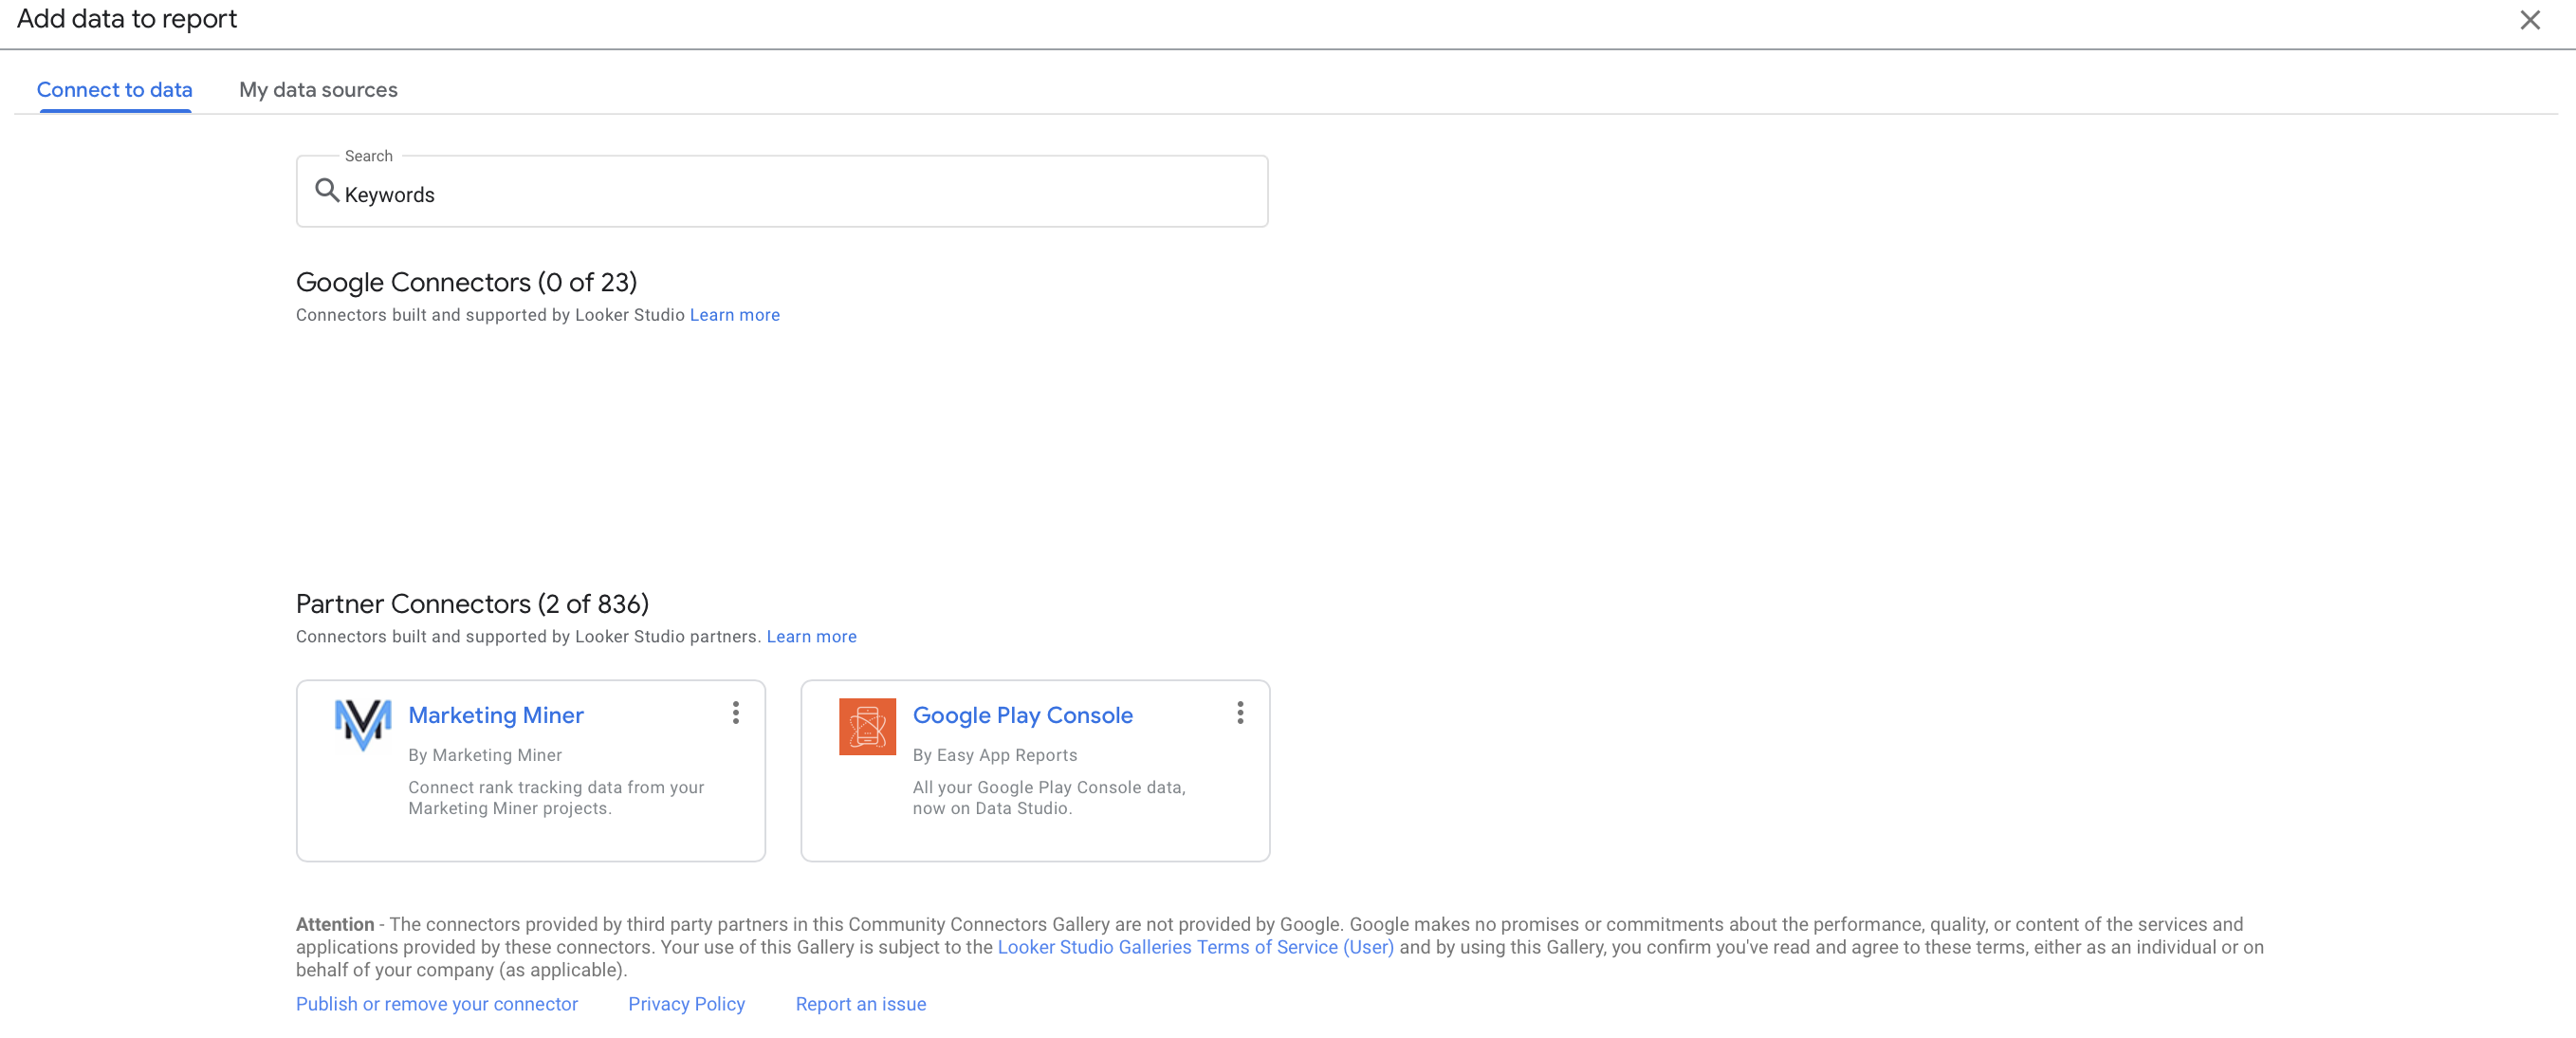
- Connecting data from multiple sources: The platform can unify data from a mind-boggling 800+ sources and 600+ data connectors, which means you can upload and integrate multiple data sets into one comprehensive report. This not only saves time, but also provides more accurate insights into business performance for organizations with complex digital environments.
- User-friendly insights: Looker Studio’s visual dashboards are easy to interpret, customize, and share – even with executives who might not be as digitally fluent as you. You can choose from a variety of drag-and-drop data visualization options, such as charts, graphs, and tables, or use Looker Studio’s pre-designed visualizations.
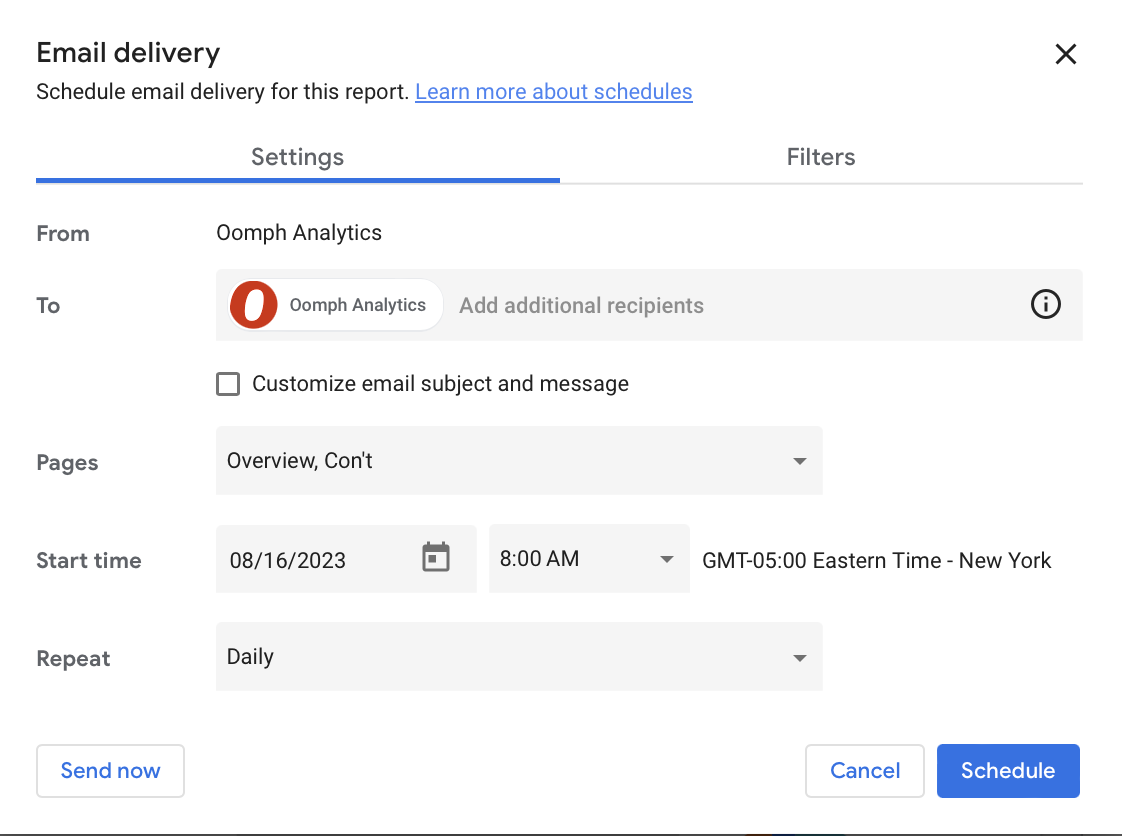
- Powerful customization: Want to be informed the minute your form conversion rate changes? With Looker Studio, you can set up alerts to notify you of significant changes in your data, enabling you to adjust your marketing strategy and optimize ROI in real time. You can also generate reports to track your progress and share them with your clients or team members.
How Oomph uses Looker Studio
As a digital-first company in the business of helping other digital-first companies, we’re big fans of Looker Studio. We think the platform is a great way to share trends on your websites and apps in an easy-to-digest way, making monthly or quarterly reporting much more efficient.
Whether you’re looking for basic insights or need sophisticated analysis, Looker Studio’s visualization capabilities can support smarter, more informed digital decision-making. Here’s a peek at some of the metrics we monitor for our own business, including:
- Number of users
- New users versus returning users
- Average time spent on site and on page
- Top pages viewed
- Traffic sources
- Traffic by device
- Event tracking and conversion rates
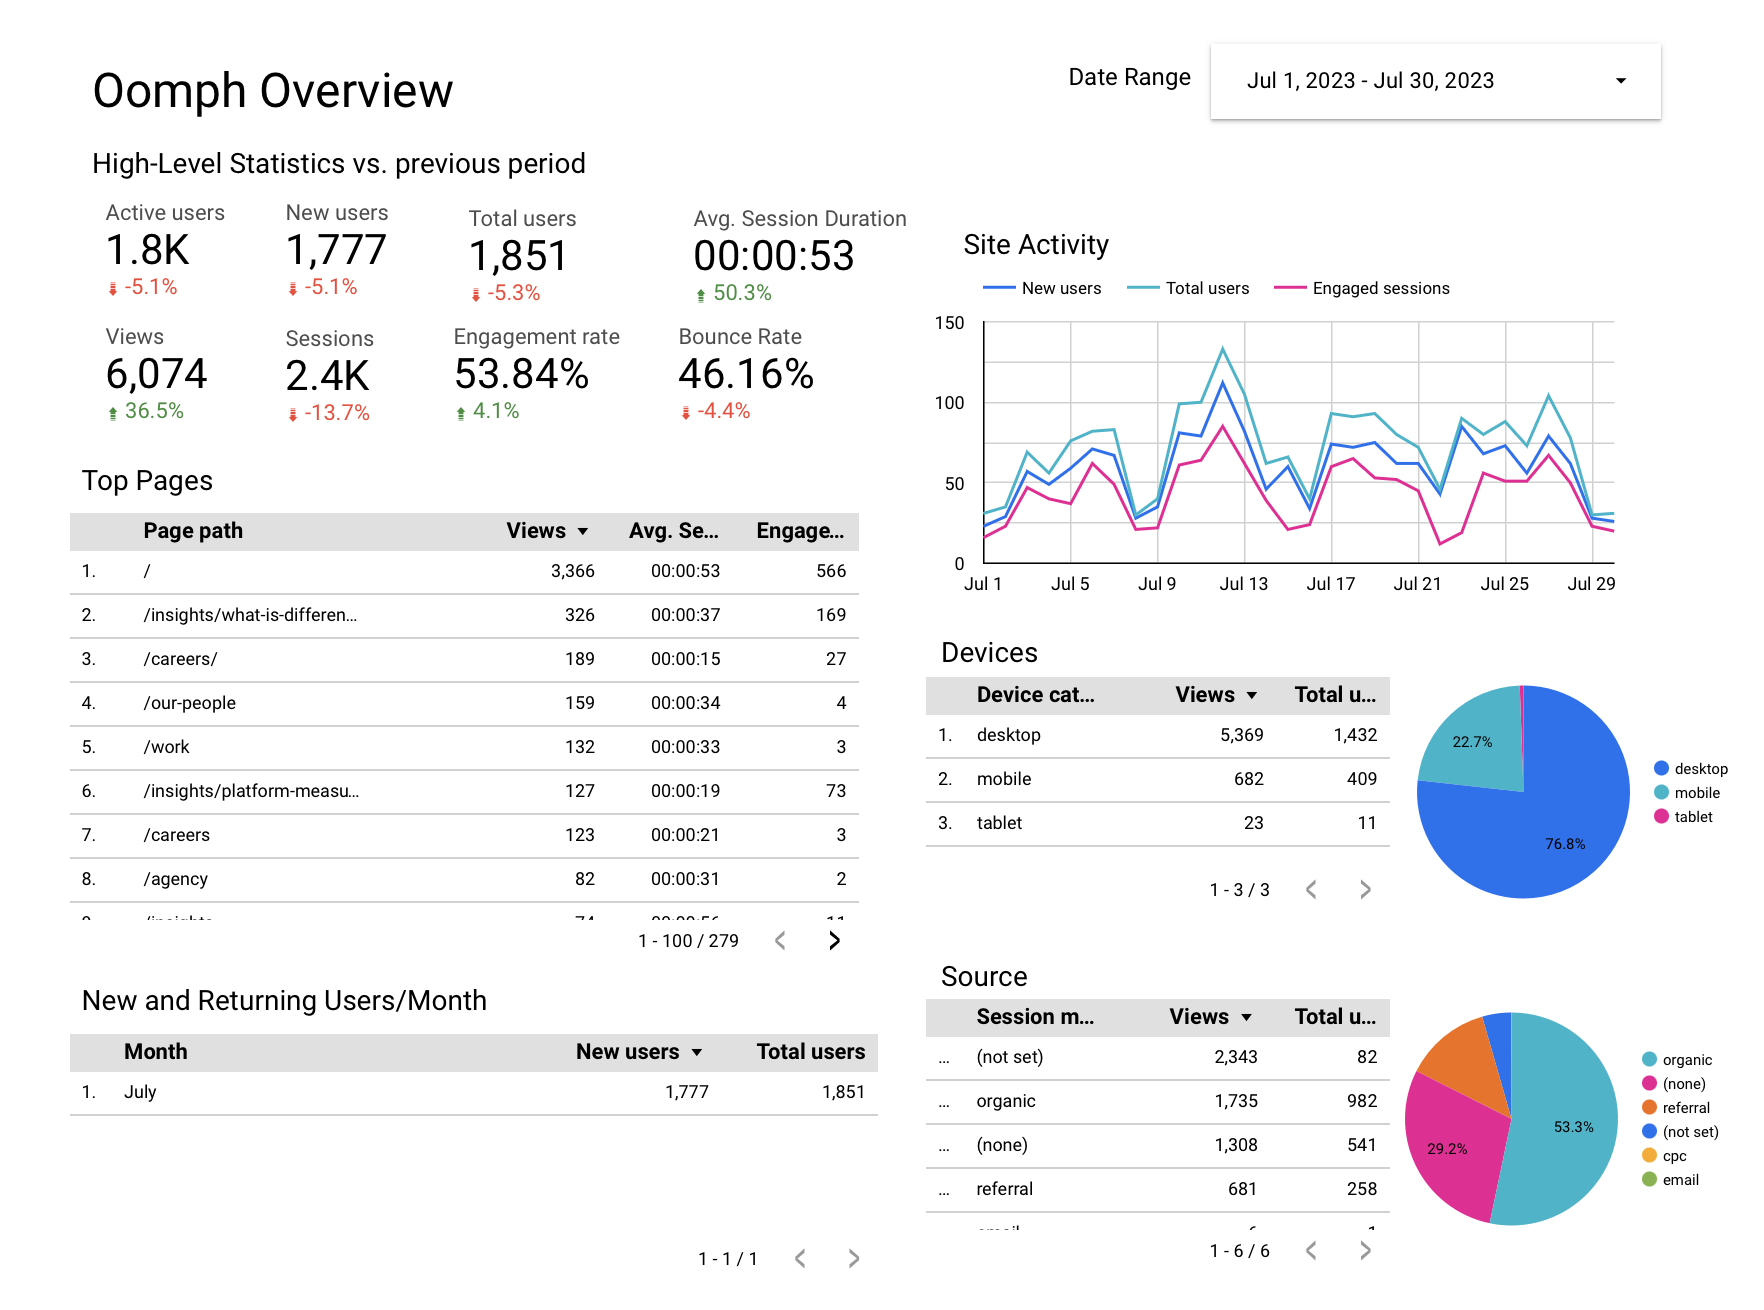
We also use the platform to drill deeper, comparing trends over time, identifying seasonal fluctuations and assessing the performance of specific campaigns. We leverage features like dashboards and filters in Looker Studio to give our clients an interactive view of their data.
How Looker Studio Works With GA4
Google Analytics, now known as GA4, is one of the primary tools we connect to Looker Studio. GA4 is the latest version of Google’s popular analytics platform and offers new features and functionality compared with its predecessor, Universal Analytics (UA), including new data visualization capabilities.
As many companies migrate over to GA4, they may be wondering if reporting will be similar between GA4 and Looker Studio – and if you need both.
While GA4 reports may challenge Looker Studio’s capabilities, Looker Studio provides a variety of features that go beyond what GA4 can do on its own. While GA4 dashboards and reports just include GA4 data, Looker Studio can import data from other sources as well. This means you can use Looker Studio to track trends in your site’s performance, regardless of the data source.
Looker Studio also has a unique feature called “LookML,” which allows users to create custom data models and transformations. This means you can tailor your data to your specific needs, rather than being limited by GA4’s built-in reporting. Finally, Looker Studio’s robust sharing and collaboration features allow teams to share data and insights easily and efficiently.
If your company set up Looker Studio before switching to GA4, you may notice a few metrics are now out of sync. Here are a few adjustments to get everything working correctly:
- Average time on page: This was previously a standard feature in UA that’s no longer available in GA4. To configure, you’ll need to track the “user engagement” metric divided by “number of sessions.”
- Bounce rate: Tracking bounce rate with GA4 now takes an additional step as well. To configure, subtract the “engagement rate” metric from 1 to arrive at your bounce rate.
- Events: Simply update your Looker Studio connection settings to use the new GA4 event schema and ensure that you’re using the correct event names and parameters in your LookML code.
How To Set Up a Looker Studio Report
- Choose a template for your dashboard or create one from scratch. If you’re not sure, you can browse through templates to get an idea of what Looker can do.
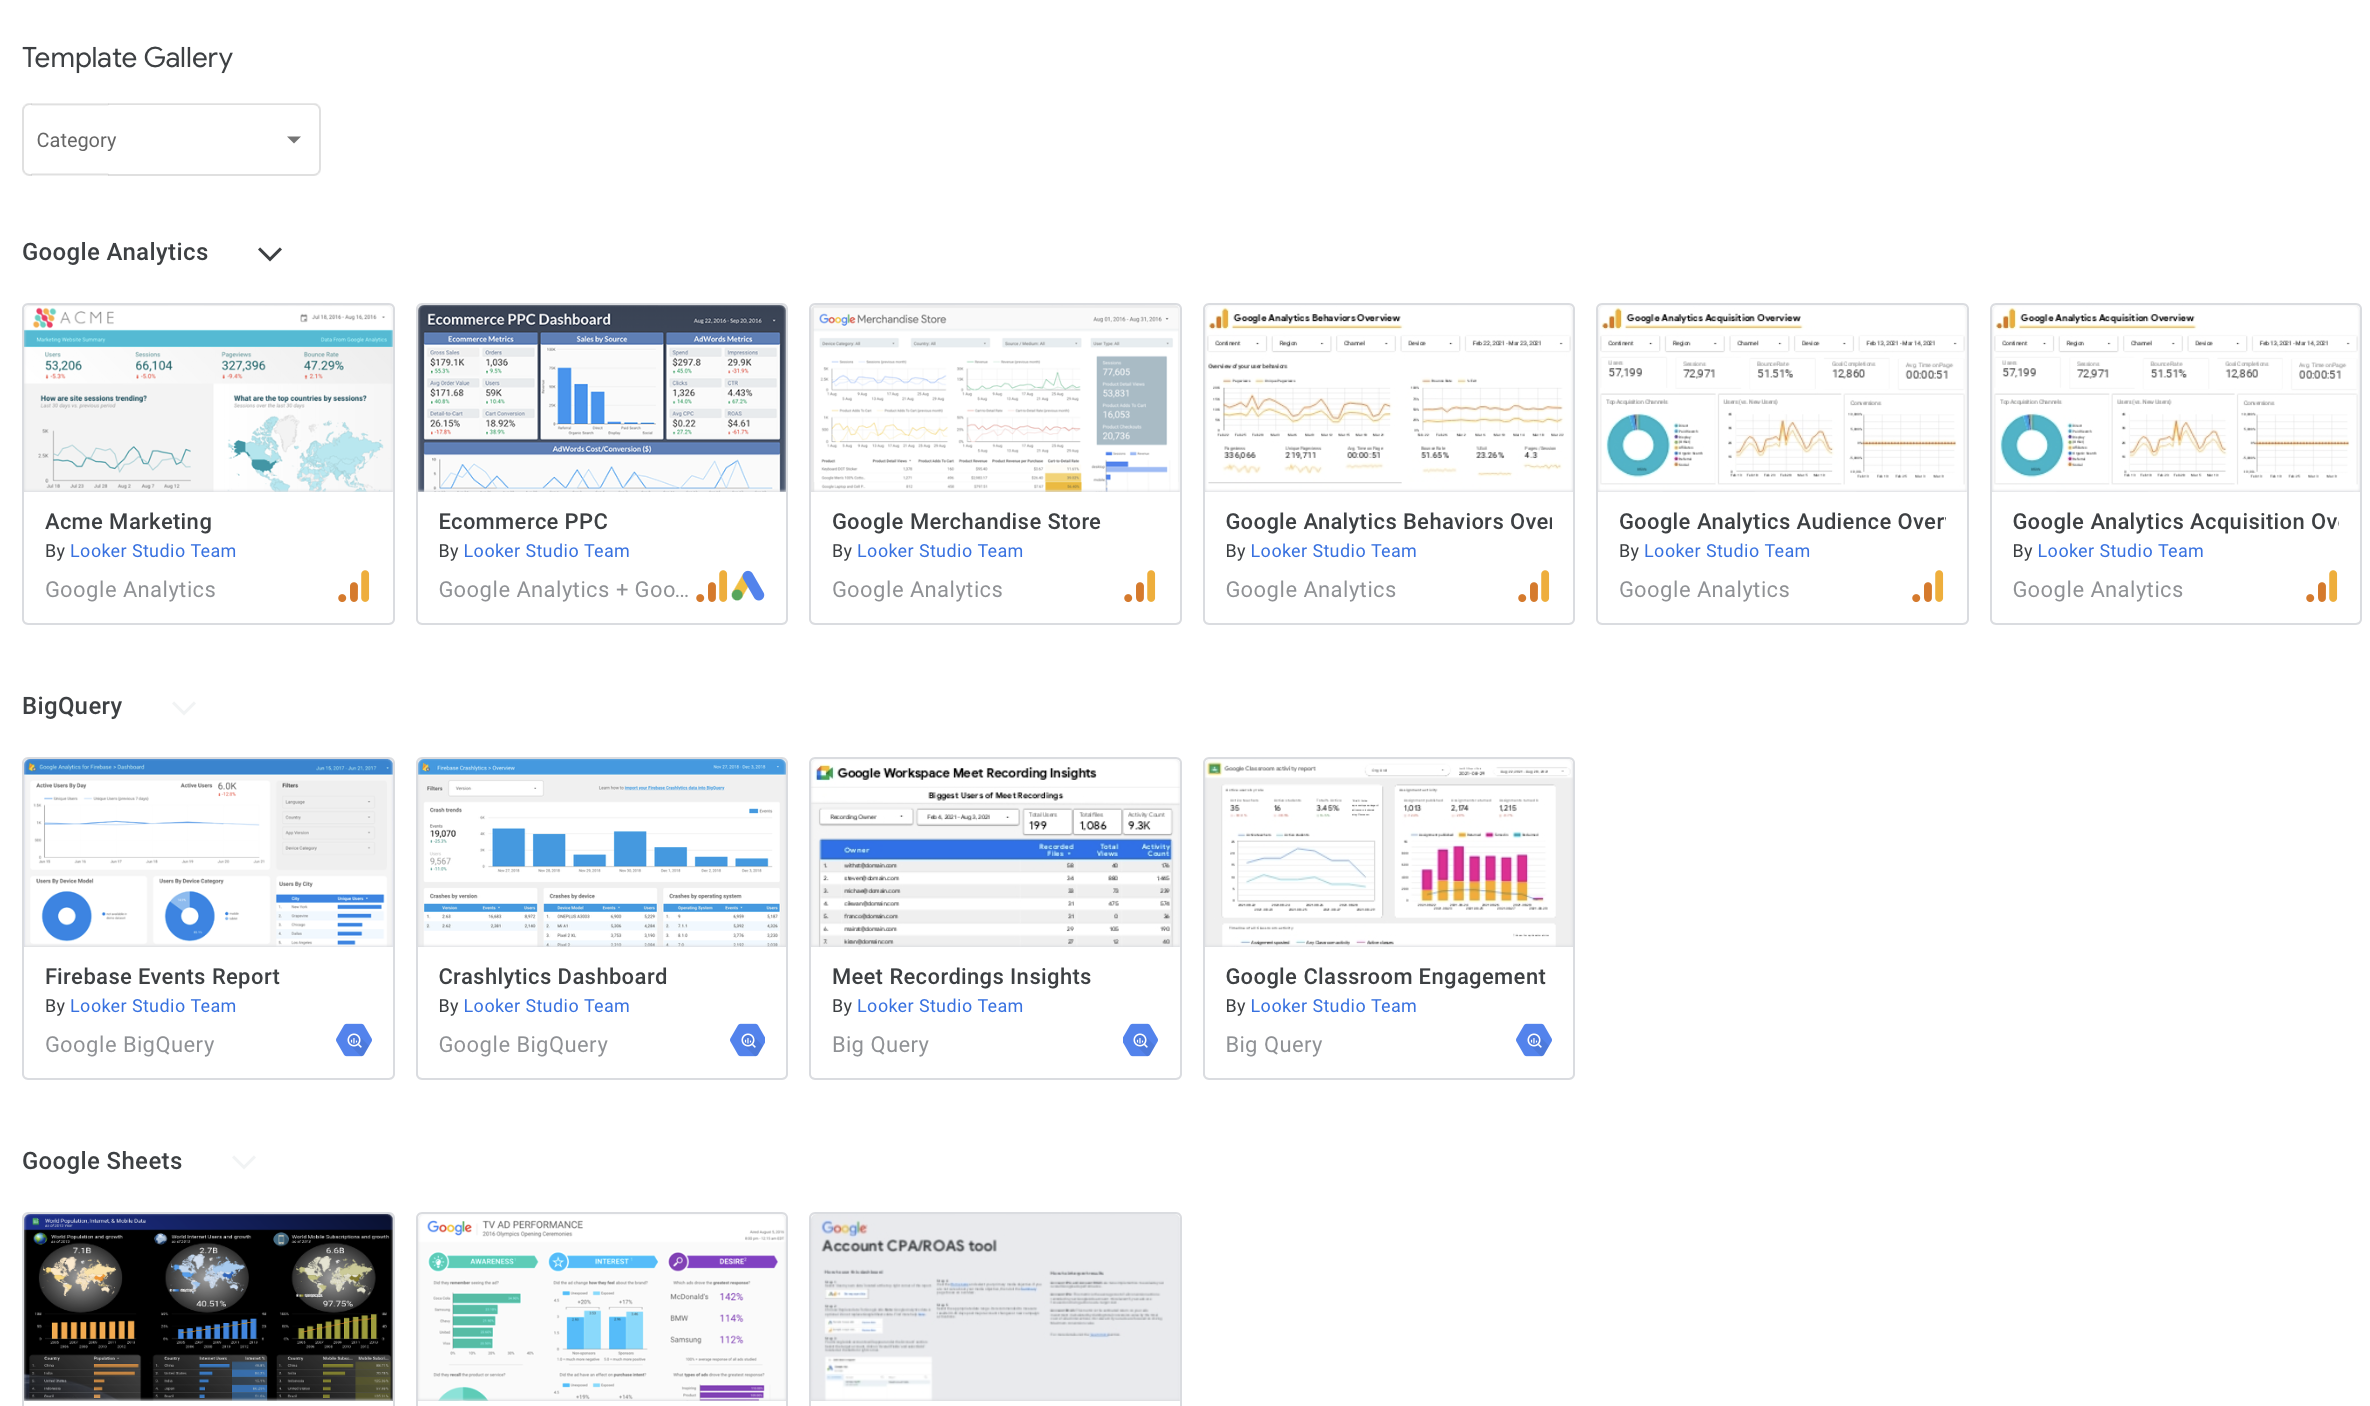
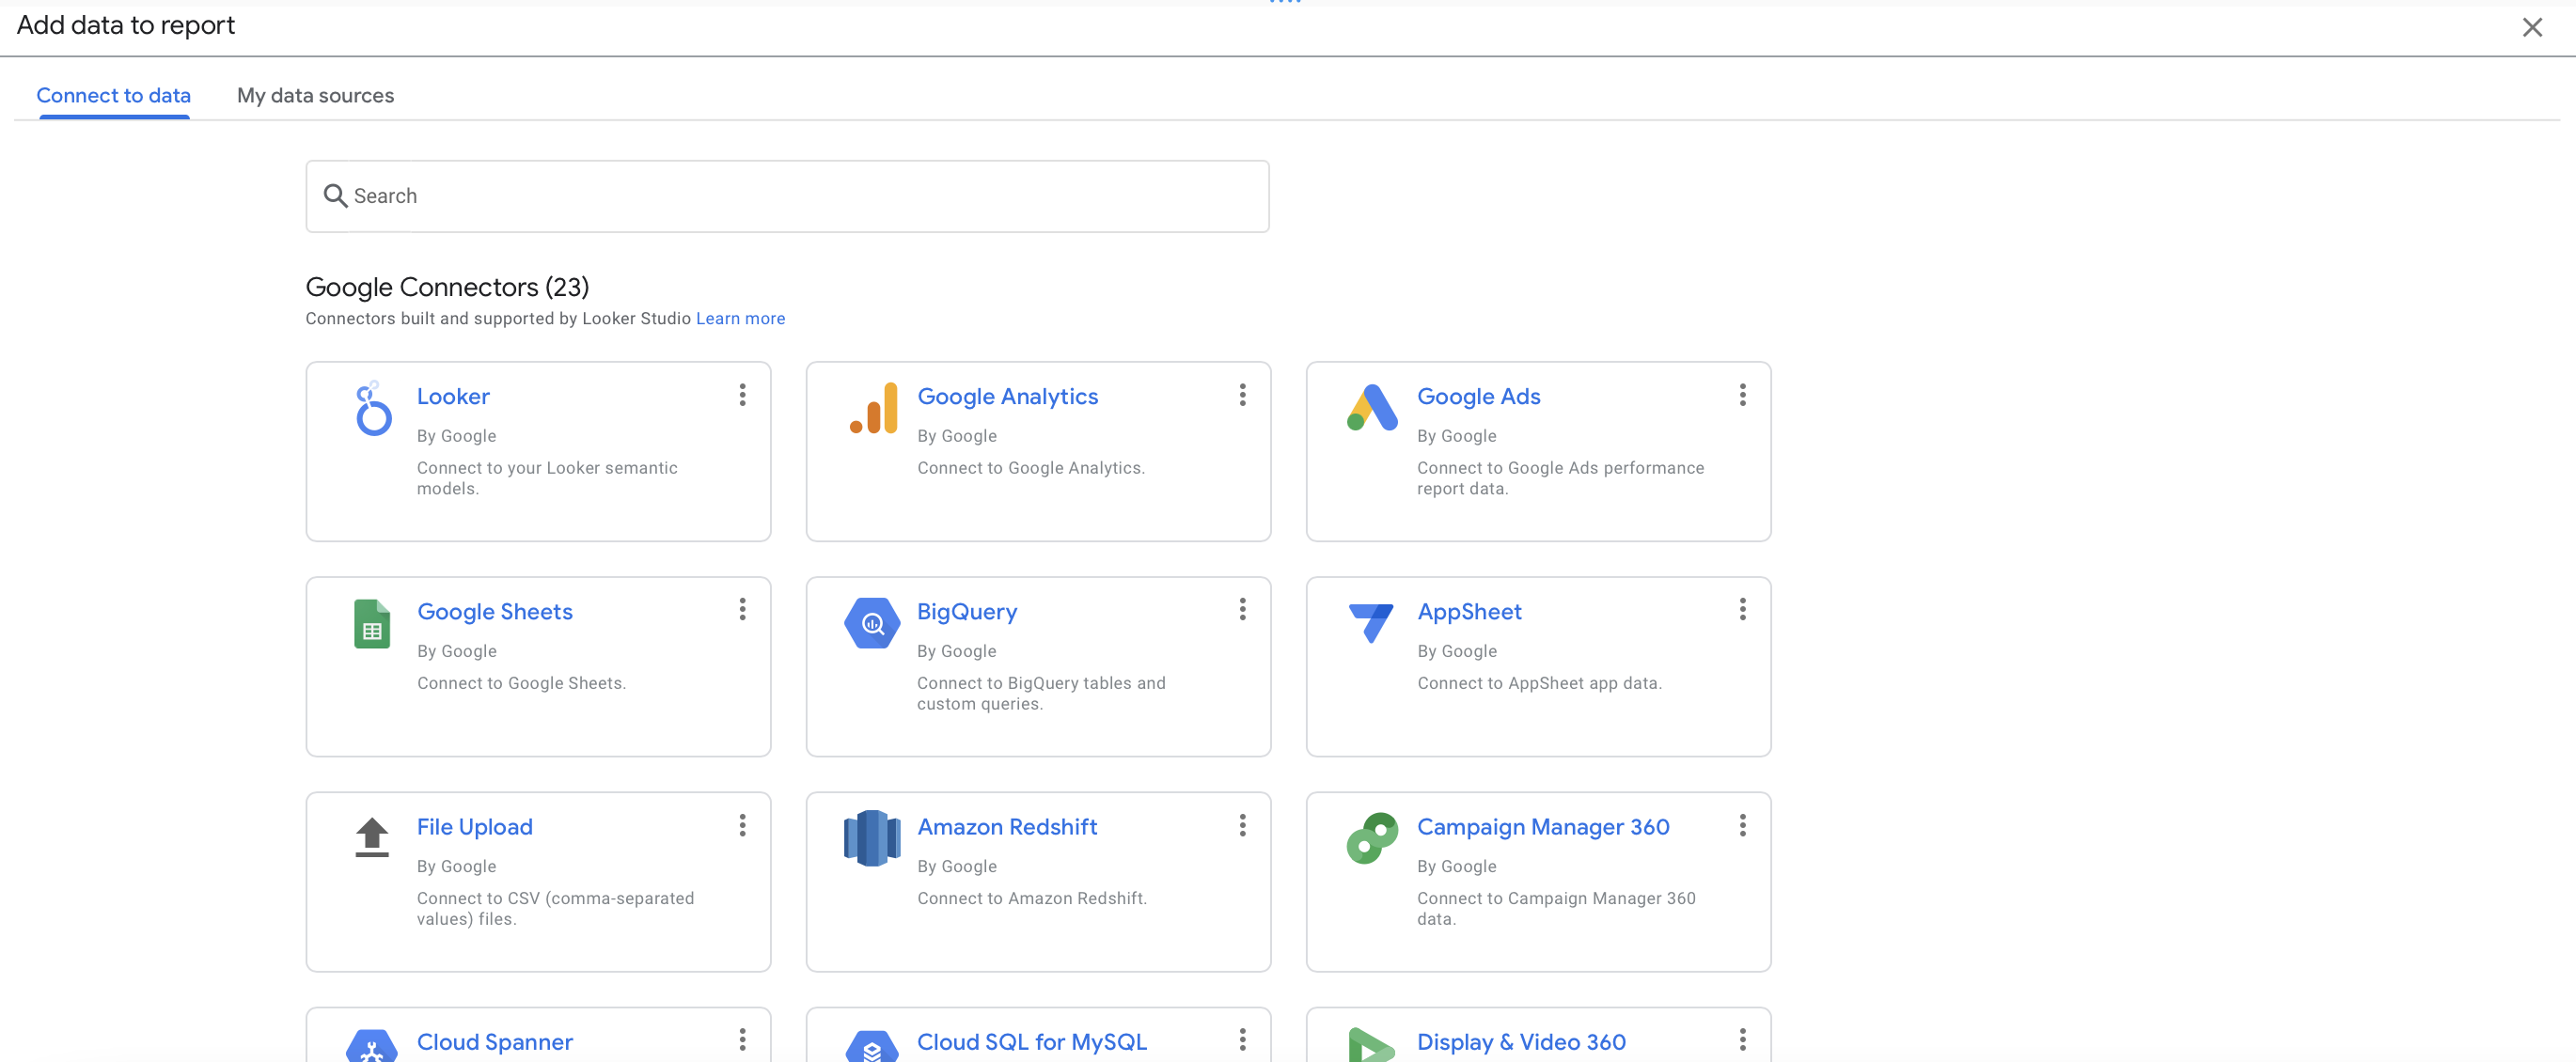
- Connect your data source. Looker supports a long list of sources, including Google, MySQL, AWS Redshift, and more. Don’t worry if your data isn’t in Google – Looker will likely be able to connect to it regardless.
- Choose your metrics. These are the specific data points you want to track and analyze in your report. You can customize your metrics to fit your specific needs.
- Build your dashboard. You can add charts, tables, and other visualizations to help you understand your data. Looker makes it easy to drag and drop these elements into place.
- Share it with others. You can either create a share link so that others can access the dashboard directly or you can set up automatic updates to be sent on a regular basis. This makes it easy for others to stay up-to-date on changes and progress.
A Powerful Path To Data Insights
The digital landscape is growing more fragmented and complex by the day, but tools like Looker Studio make it infinitely easier to find your path forward. Taking the time to configure and customize the platform can deliver major ROI by helping you understand user needs, pinpoint website strengths and challenges, and craft the right digital strategy.
Crunched for time or not sure where to start? Oomph can help take the hassle out of data analysis by setting up and monitoring your Looker Studio dashboards. Get in touch to chat about your needs.
It’s been over a year since we joined 1% for the Planet, becoming part of a global network of businesses committed to putting the planet and people over profit. Joining the community was a longtime dream for Oomph, and it’s honestly been a blast so far.
We spent Year 1 building bridges, flexing our strategy skills, and investing in sustainable businesses to meet our commitment as a whole company — donating 1% of our gross annual sales to environmental causes. We learned a ton, and we pinpointed a few things we could do better. Now that Year 2 is in full swing, here’s how we’re making our membership even more impactful.
Keeping Our Dollars Local
As a 1% for the Planet member, at least half of our 1% donation must come through monetary donations. During our first year, we put our dollars toward Planet Impact Fund, a donor advised fund that invests in promising for-profit climate solutions and makes grants to nonprofit environmental partners.
While we loved working with Planet Impact Fund (which also just celebrated its first year!), we’re expanding our approach in Year 2. Making our work personal is one of our core values as a company, and we wanted to bring that value into our giving by distributing some of our funds directly in the communities where our teammates live. We asked our team to nominate local organizations doing environmental work, and the ideas are already pouring in. Here are a few worthy causes we’re proud to support this year (all links are to the 1% for the Planet directory):
- Audubon Society of Rhode Island: A local chapter of the National Audubon Society focused on protecting birds and other wildlife through conservation, education, and advocacy.
- Ausable River Association: An organization located in Wilmington, New York, in the northern Adirondack mountains, which focuses on engaging the community to protect the Ausable watershed to maintain clean water, healthy streams, and biodiverse habitats, while supporting responsible low impact public enjoyment of the area.
- Buzzards Bay Coalition: An organization in New Bedford, Massachusetts, focused on protecting clean water in Buzzards Bay and the surrounding land.
- Explore Ecology: An environmental education and arts nonprofit located in Santa Barbara, California, that focuses on inspiring children to engage with the natural world and experience the value of environmental stewardship.
- Maine Needs: A grassroots organization in Portland, Maine focused on providing for the material needs of people in their community through donated goods.
- New England Mountain Biking Association (NEMBA): A mountain biking community in New England focused on creating responsible trail stewards to preserve open space while providing epic riding experiences.
- Southside Community Land Trust: An organization located in Providence, Rhode Island, whose gardens, farms, and programs enable all Rhode Islanders to grow and enjoy healthy food.
- Surfrider Foundation Cape Fear: A local chapter of the national Surfrider Foundation focused on the protection and enjoyment of the world’s oceans, waves, and beaches for all people.
- Urban Harvest STL: An urban farming organization located in Saint Louis, Missouri, that is helping to provide equitable access to healthy food and the ability for people to grow it themselves if they want to.
- Westport River Watershed Alliance: An organization located in Westport, Massachusetts, focused on protecting the local watershed through science, advocacy, education, and community outreach.
Focusing on Deeper Impact With In-Kind Partnerships
Collaborating with the Nature Conservancy’s Rhode Island chapter on a full-day strategy sprint was so much fun for our team. Without an ongoing partnership, though, it can be tough for an organization like the Nature Conservancy to translate this type of strategy into a full-fledged digital build solo.
That’s why we’re shifting our focus in Year 2 to a longer-term project for a partner doing environmental work. We believe that by delivering a tangible end result, like a refreshed website or app, we can more fully live out our commitment to elevate our clients and make a meaningful difference for our planet. Our team is currently evaluating project opportunities with our environmental clients – let us know if you have one in mind!
Continuing Our Commitment Through Community
Since we joined 1% for the Planet, we’ve been amazed by the passion and expertise across the member community. Not only are these organizations invested in growing their own impact for the environment, they’re dedicated to challenging and encouraging one another to do the same – from working with more B Corp service providers to finding ways to reduce their carbon footprint.
Being surrounded by this kind of unflagging enthusiasm has been one of the biggest and most unexpected benefits of becoming a member. We’re all in on advancing environmental justice with everything we do, and we can’t wait to see what our collective efforts can accomplish for our planet and all its people.
Want to join a team that shares your commitment to creating a sustainable world?
We’re hiring!
Humans encounter thousands of words every day. As a website owner, that means your site content is vying for your user’s attention alongside emails from their colleagues, the novel on their nightstand, and even the permission slip scrunched at the bottom of their kid’s backpack.
How do you cut through the clutter to create site content that people actually want to read?
While you may already be choosing topics that are the most interesting and relevant for your audience, the structure of your writing may not be optimized for how people read. By understanding your audience’s reading behaviors following best practices for readability and accessibility, you can make sure your content works with people’s natural tendencies – not against them – to create a more engaging digital experience. An added bonus: Google shares many of those same tendencies, so content that’s designed well for humans is also more likely to perform well for organic SEO.
As a digital platform partner to many clients with content-rich sites, Oomph often works with brands to redesign their content for digital success. Here’s a look at the basic principles we apply to any site design – and how you can use them to your advantage.
How People Read Online
When we dive into a book, we typically settle in for a long haul, ready to soak up each chapter one by one. But when we open up a website, it’s more like scanning a newspaper or the entire bookshelf – we’re looking for something specific to catch our eye. We quickly scan, looking for anything that jumps out at us. If we see something interesting, then we’ll slow down and start reading in more detail.
Think of it like an animal following an information “scent,” identifying a mixture of clues that are likely to lead to the content you’re looking for. Most people will decide which pages to visit based on how likely the page will have the answer they’re looking for and how long it’s going to take to get the answer.
Users need to be hooked within a few moments of looking at a website or they’ll move on. They need to be able to identify and understand key factors like:
- The point of the information and why they should keep reading
- Whether they can trust the information and the source
- The type of content provided and any action expected from them, like signing up for an event
- How visually engaging and readable the content is
The takeaway for brands? Writing with your readers’ needs in mind is a way to show them you care and want to help them solve their problem. It’s also the key to achieving your site goals.
Your site content does more than just convey information – it’s about building trust, establishing rapport, and creating a connection that goes beyond the page. Whether you’re trying to sell a product or promote a cause, crafting content around your audience’s needs, desires, and preferences is the most effective way to compel them to take action. Here are four ways to set your website content up for success.
1. Put your data to work.
If you’re looking to refresh your current site, data can help you make informed choices about everything from your content strategy to your layout and design. Use digital reporting tools to answer questions like:
- Is our target audience visiting our site – and are other audiences visiting that we don’t know about yet?
- Which content do visitors download or engage with most frequently?
- What does a typical site visit look like? Are there places where users are getting stuck or bouncing off?
Google Analytics is a go-to tool for understanding the basics of who is visiting your site and how they’re engaging with your content. You can track metrics like session duration, traffic sources, and top-performing pages, all of which can help you better understand what your audience is looking for and what you want to tell them. (If you haven’t made the switch to Google Analytics’ latest platform, GA4, jump-start the process with our 12-step migration guide.)
Additional tools like Screaming Frog and Hotjar can give you even deeper insights, helping you track content structure and real-time user interactions.
2. Create a simple and consistent content structure.
When it comes to site content, consistency is like the foundation of a house (minus the power tools and hard hats).
A well-structured site not only helps users navigate and understand your content more easily, but also enhances the visual appeal and flow of the site. Think of it like a dance floor – you want your users to be able to move smoothly from one section to the next, without any awkward missteps.
That means focusing on shorter sentences, bullet points, and clear subheadings, all backed up by engaging visuals that serve as resting points for the eye. And while you’re at it, don’t forget to declutter your content — users don’t want to wade through a sea of unnecessary words just to find the nuggets of gold.
Ask yourself: Does this content flow smoothly, is it easy to scan, and does it make my key messages stand out? If the answer is yes, then you’re on your way to successful content.
3. Make sure visuals and content play nicely together.
When it comes to enhancing your content with visuals, the key is to strike a balance between style and substance. Your design should complement your content, not compete or distract from it.
Beyond their aesthetic appeal, well-designed visuals are important for creating a sense of credibility with users. Think back to the concept of information scent: If your design looks sloppy or inconsistent, users are less likely to trust the information you’re presenting. So make sure you’re using design elements wisely, creating ample white space, and avoiding anything that makes your content feel like a sales pitch.
4. Focus on accessibility.
When it comes to site content, accessibility can’t be ignored. Content should be engaging and informative and also conform to the , Website Content Accessibility Guidelines (WCAG). Tools like SortSite can help identify these issues and guide you toward accessibility success.
There are a number of things all sites need to consider:
- Using consistent text stylings, including text color, leading, kerning, and tracking.
- Design to support individuals with visual impairments, assistive technology like screen readers, and those that require navigation via the keyboard only
- Following heading orders and grouping content together to make it easier to scan. For example: Following a heading level 2 with a heading level 3 when the ideas are related, but starting with a new heading 2 if changing to a new section of thought.
- Using multiple methods to indicate action items and descriptive text for buttons and alternative text.
- PDFs can be useful, but are also big accessibility red flags, so it’s best to avoid using them when possible. If a PDF is a must, make sure it follows accessibility best practices.
Designing Engaging Content Doesn’t Need To Be a Full-Time Job
If you already have a library of content, auditing the content that already exists can be daunting. And sometimes, you need a little help from your friends. That’s where third-party experts (like us!) come in.
During our website discovery process, we use strategies like content and analytics audits, UX heuristics, and user journey mapping to help position client sites for success. We’ll help you identify areas for improvement, highlight opportunities for growth, and guide you toward achieving content greatness.
Ready for a fresh perspective on your content? We’d love to talk about it.
On the hunt for the right vendor to help with your website refresh or app launch? Creating a request for proposal (RFP) is often an essential – and even required – first step. But much like digital experiences themselves, RFPs can range widely in quality.
At their best, RFPs clearly educate potential partners about your needs and help you compare your choices more easily. At their worst, RFPs are vague, complicated, and time-consuming for everyone involved. That can prompt some vendors to bypass them completely, leaving you with a less-than-stellar pool of options.
Many agencies see RFPs as a high-risk, low-reward business development strategy and are selective about responding, since they can eat up so much time. Case in point: The average company spends 32 hours and has 9 team members work on each RFP, yet wins less than half of them.
Despite all this, RFPs aren’t going anywhere. So how can you create an RFP that will actually attract the type of partner you want?
At Oomph, we review hundreds of RFPs every year to find the projects that are best suited for our skills. After sorting through the good, bad, and truly ugly, we’ve established an internal scoring system for potential RFPs — and learned some valuable lessons along the way.
Here are nine key factors that can help ensure your RFP stands out from the rest.
1. Embrace open communication.
By establishing open lines of communication from the outset, you can build a sense of trust and clarify questions to ensure the proposed solutions meet your needs.
If holding calls with individual vendors isn’t an option, hosting a pre-bid call is one effective way to gain face time with several prospective partners at once. Connecting live can give you a sense of how your two teams will mesh. For example, if an agency flakes on the call, those issues will likely only get worse during the project itself. On the flip side, a vendor who gets your goals and needs can often give you a more customized and accurate estimate.
2. Be as transparent as possible with your budget.
Ah, the million-dollar question: How much will this all cost? Some organizations decline to share a budget in their RFP, either because they’re not allowed to or because they don’t want vendors to inflate their price to match the stated budget. But omitting a dollar figure can quickly lead to frustration on all sides: You don’t want to waste time sorting through responses that aren’t in your budget, and agencies don’t want to respond to potential clients who can’t meet their rates.
By providing a targeted cost, you build trust with potential partners and avoid wasting time on solutions that are out of your price range. When including a budget, be clear on how vendors should respond. Do they need to list every expense as a line item or can they group costs? Should they include additional items that they think could enhance the project?
If you’re in an industry where you can’t share a budget, consider at least including a not-to-exceed figure. Otherwise, be prepared to sift through huge swings in costs. This is one instance where getting specific about your desired solution can actually be a good thing. Noting that you’re looking for a templated website vs. a custom build, for example, can help you avoid getting some proposals that come in at $20,000 and others that come in at $200,000.
3. Give ample time during the process.
RFPs are a lot of work and you don’t want to rush. A hasty process can increase the likelihood of mistakes, omissions, or incomplete responses from potential partners.
If you’re accepting questions on your RFP, make sure you leave enough time after answering them for agencies to formulate their response. If you have a second round, create some breathing room for agencies to prepare, especially if you’re expecting a presentation.
4. Provide the basics on your company.
Vendors want to know who you are and what you’re about. This includes basic details like the products or services you offer, your location, and your audience.
You should also include details on what makes your organization different. What sets you apart? What’s your mission? This will help vendors better understand your company’s goals, allowing them to tailor their proposals to your specific request.
Finally, let vendors know who will be spearheading the project on your team. Are there multiple decision-makers? Will your board need to sign off? Sharing information on your working style can help attract vendors who are a good fit and ensure they plan for the right level of collaboration in their scope.
5. Focus on your project goals, not the solution.
When creating an RFP, it’s easy to get caught up in the specific deliverable you think you need. But try to think big picture.
What do you want to accomplish? What was the impetus behind this work? For example, if your online leads are slowing down or it’s been ages since you last refreshed your design, share the details in your RFP. Make sure to include any project constraints as well, like if you want the winning firm to use your existing technical setup or if you’re open to new solutions.
By focusing on challenges and goals vs. proscriptive solutions, you allow potential partners to propose ideas that you may not have considered — but could be more effective than your initial solution.
6. Let applicants know which response formats are (and aren’t) OK.
List out the required elements you want to see in a proposal, like solution overview, a proposed timeline, and relevant work samples. Providing a standard framework can make it easier for agencies to assess the effort involved before deciding whether to respond and help you compare the strengths and weaknesses of various approaches. If any items are high-priority, be clear about where you expect applicants to spend the most time.
While providing details on what you’d like to see in the proposal is a smart move, be flexible if possible on how agencies deliver their response. If your project involves design work, allowing agencies to submit a PowerPoint deck instead of a written response can give you a glimpse at their design skills and how they interpret your brand based on the RFP. If you need proposals submitted in a specific format, go digital if possible. Most agencies will click “Pass” on any RFP that requires submitting 10 printed copies of a 30-page response.
7. Be clear on what will set applicants apart.
Think about what would make your partner a perfect fit for your organization. Is it experience in your industry or working with your preferred CMS? Is hiring a woman- or BIPOC-owned firm important to you? Are you eager to find a local agency that you can collaborate with in person?
By explicitly stating what will set top-tier candidates apart, you not only motivate vendors to put their best foot forward, but also give them the guidance they need to do so. Providing specific evaluation criteria in your RFP can also help ensure that the vendors who respond are the ones best suited to your project’s needs.
8. Consider your invites carefully.
The RFP process is meant to help you choose a single partner to meet your needs. Finding your ideal match requires carefully considering their expertise, proposed solution, and alignment with your company’s culture and values. So when you send your RFP, aim for quality over quantity in responses. Reviewing proposals from vendors who lack the necessary skills or who are a poor fit can lead to wasted time and, ultimately, a less successful project.
Beyond posting your RFP across your channels, think about how to proactively find the best partner for the job. Doing research in your industry and even asking competitors or affiliates who they’ve worked with can help narrow down your search.
9. Hold off on those references.
We get it – it’s helpful to get a second (or third, or fourth…) opinion when choosing a partner. However, it’s best to wait until you’ve narrowed it down to a few potential partners before reaching out to their references.
Why? You don’t want to waste your time contacting references for vendors who may not end up being a good fit for your project. Some vendors also may not want their clients contacted over and over again for early-stage RFPs. By waiting until you’ve narrowed down your list, you’ll likely have better, more specific questions to ask the references based on the vendor’s proposed solution.
Creating a Win-Win RFP Process
With the help of a well-crafted RFP, you can attract top-tier vendors who will be eager to flex their creative muscles and propose solutions that achieve your project’s goals. By prioritizing transparency, setting clear expectations, and valuing communication, you can establish a strong foundation for a productive and successful collaboration.
Need a fresh perspective on your digital project RFP? We’d love to talk about it.
Have you ever tried to buy tickets to a concert and experienced the frustration and eventual rage of waiting for pages to load, unresponsive pages, unclear next steps, timers counting down, or buttons not working to submit — and you probably still walked away with zero tickets? Yeah, you probably had some choice words, and your keyboard and mouse might have suffered your ire in the process.
As a website owner, you strive to create a seamless user experience for your audience. Ideally, one that doesn’t involve them preparing to star in their own version of the printer scene in Office Space. Despite your best efforts, there will be times when users get frustrated due to slow page loads, broken links, navigation loops, or any other technical issues. This frustration can lead to what the industry calls “rage clicks” and “thrashed cursors.” When your users are driven to these actions, your website’s reputation, engagement, and return visits can be damaged. Let’s dig in to discuss what rage clicks and thrashed cursors are and how to deal with frustrated users.
First of all, what are Rage Clicks?
Rage clicks are when a user repeatedly clicks on a button or link when it fails to respond immediately — the interface offers no feedback that their first click did something. This bad user experience doesn’t motivate them to return for more. These clicks are likely often accompanied by loud and audible sighs, groans, or even yelling. “Come on, just GO!” might ring a bell if you’ve ever been in this situation. Rage clicks are one of the most frustrating things a user can experience when using a website or app.
Rage Clicks are defined technically by establishing that:
- At least three clicks take place
- These three clicks happen within a two-second time frame
- All clicks occur within a 100px radius

Similarly, what is a Thrashed Cursor?
A thrashed cursor is when a user moves the cursor back and forth over a page or element, indicating impatience or confusion. Various issues, including slow page load times, broken links, unresponsive buttons, and unclear navigation, can cause users to exhibit these digital behaviors. It can also indicate the user is about to leave the site if they cannot find that solution quickly.
Thrashed cursors are defined technically by establishing that:
- There is an area on the page where a user was moving their mouse erratically
- An established pattern of “thrashing” occurs around or on specific elements or pages
- Higher rate of user exits from the identified pages
Why do Rage Clicks and Thrashed Cursor happen?
Common reasons rage clicks and thrashed cursors happen are:
- Poor Design: Poor design is one of the most common reasons for rage clicks and thrashed cursors. If the website has a confusing layout or navigation structure, it can be frustrating for users to find what they’re looking for. Or, they may assume an element is clickable; when it’s not, it can be irksome. Underlined text is an excellent example, as users often associate underlines with links.
- Technical Issues: Technical issues such as slow loading times, broken links, or non-responsive buttons can cause rage clicks and thrashed cursors. Users expect the website to work correctly; when it doesn’t, they can become annoyed or frustrated. If they click a button, they expect the button to do something.
- Lack of Clarity: If the website’s content is unclear or poorly written, it can cause confusion and frustration for users. They may struggle to understand the information provided or find it challenging to complete the intended action. Content loops can be a good example of this. Content loops happen when users repeatedly go back and forth between pages or sections of a website, trying to find the information they need. Eventually, they’ll become frustrated, leading to this user leaving the website.

How do you resolve issues that lead to Rage Clicks and Thrashed Cursors?
Now that we know what rage clicks and thrashed cursors are and why they happen, how do you resolve it, you may be asking. Here are a few things an agency partner can help you with that can significantly reduce the risk of your users resorting to these behaviors.
Use Performance Measuring Tools
By employing performance measuring, you can analyze the data collected, gain valuable insights into how users interact with your platform, and identify areas for improvement. For example, if you notice a high number of rage clicks on a specific button or link, it may indicate that users are confused about its functionality or that it’s not working correctly. Similarly, if you see a high number of thrashed cursors on a particular page, it may suggest that users are struggling to navigate or find the information they need.
Tools that support Friction or Frustration measurement:
- Clarity (from Microsoft)
- ContentSquare
- Heap
- HotJar
- Mouseflow
- Quantum Metric
Conduct User Experience Exercises and Testing
Identifying the root causes of rage clicks and thrashed cursors can be done through a UX audit. An agency can examine your website design, functionality, and usability, identifying areas of improvement.
- User Journey Mapping: User journey mapping involves mapping the user’s journey through your website from a starting point to a goal, identifying pain points along the way, and determining where users may get stuck or frustrated.
- Usability Testing: Usability testing involves putting the website in front of real users and giving them tasks to complete. The tester then looks to identify issues, such as slow loading times, broken links, or confusing navigation.
- User Surveys: User surveys can be conducted in various ways, including online surveys, in-person interviews, and focus groups. These surveys can be designed to gather information about users’ perceptions of the website, interactions with the website, and satisfaction levels. Questions can be designed to identify areas of frustration, such as difficult-to-find information, slow page load times, or confusing navigation. It’s wise to keep surveys short, so work with your agency to select the questions to garner the best feedback.
- Heat Mapping: Heat mapping involves analyzing user behavior on your website, identifying where users are clicking, scrolling, and spending their time. This can identify areas of the website that are causing frustration and leading to rage clicks and thrashed cursors.
Focus on Website Speed Optimization
A digital agency can synthesize findings from UX research and performance-measuring tools and work to optimize your website for quicker page loads and buttons or links that respond immediately to user actions.
- Image Optimization: Optimizing images on your website will significantly improve page loading times. An agency can help you optimize server settings and compress images to reduce their size without sacrificing quality.
- Minification: Minification involves reducing the size of HTML, CSS, and JavaScript files by removing unnecessary characters such as white space, comments, and line breaks. This can significantly improve page loading times.
- Caching: Caching involves storing frequently accessed website data on a user’s device, reducing the need for data retrieval and improving website speed.
- Content Delivery Network (CDN): A CDN is a network of servers distributed worldwide that store website data, improving website speed by reducing the distance between the user and the server.
- Server Optimization: Server optimization involves optimizing server settings and configurations, such as increasing server resources, using a faster server, and reducing request response time. Website owners frequently skip this step and don’t select the right hosting plan, which can cost more money through lost users and lower conversions.
Resolve Technical Issues
A web agency can help resolve any technical issues that may be causing frustration for your users. These issues may include broken links or buttons, 404 errors, slow page load times, and server errors. Technical issue resolution can involve various activities, including code optimization, server maintenance, and bug fixes that work to ensure that everything is working correctly and address any issues that arise promptly. The resolution of technical issues will improve website performance, reducing the likelihood of user frustration and rage clicks.
Next Steps
User frustration can negatively impact user satisfaction and business outcomes. Partnering with a digital agency can be a valuable investment to mitigate these issues. Through the use of tools, UX audits, user surveys, website speed optimization, and technical issue resolution, a digital agency can identify and address the root causes of user frustration, improving the overall user experience — leading to an increase in user engagement, satisfaction, and loyalty, which means improved conversion rates, higher customer retention, and ultimately, increased revenue for your business.
If your customers are hulking out, maybe it’s time to call us!
Ever get a proposal back from an agency and think, “It would be cheaper and easier to do this ourselves?”
Here at Oomph, we’ve been getting the agency vs. in-house question for years. And we totally understand why. How appealing is it to get the full-time eyes and expertise of an employee, rather than paying a similar price for what can feel like less time from an agency?
You’re not the only one thinking it. With resources and budgets tightening across industries, many companies are asking themselves how to balance price, speed, and quality in their digital work – and if agencies are the answer. In fact, a recent marketing relationship survey found that 22% of brands are actively bringing their marketing in-house, a 5% increase from the previous year.
But before you follow the trend, consider all your options. The truth is that there are times when it makes sense to hire in-house. Yet there are also plenty of situations where an agency partner can produce better work at a lower cost.
Here’s what you need to know about agency vs. in-house to decide for yourself.
The Pros of Hiring In-House
For brands that need easy access to a steady resource for ongoing work, an in-house hire might be the right fit. Bringing on a staff developer can offer benefits like:
Quicker collaboration
Full-time employees (FTE) are just down the hall or, at the very least, on the same Slack channels as you. That means you can drop a file to them to get quick edits on a new landing page, or break out the whiteboard spontaneously to brainstorm some ideas for future app features. This convenience can help facilitate more off-the-cuff creativity. It also sidesteps a lot of the red tape it takes to get websites approved and live.
Knowledge of the brand and business
Your FTE has a singular focus: you. It’s their job to know the ins and outs of your organization, and they won’t have to split their time with another brand’s work. Since your FTE will already be tapped into what works for your brand, you won’t have to spend so much time overseeing their work. What’s more, FTEs can draw from their depth of knowledge to deliver digital experiences that are truly unique to you.
Strategic alignment
A lack of strategic approach is one of the top three reasons why clients end relationships with their agencies. While agencies are packed with strategy and creative experts, that expertise is far-reaching and may extend to industries or platforms that aren’t relevant to your business. When you hire in-house, you can get laser-focused on finding a candidate with the work experiences and technical skills to align with your broader vision.
The Advantages of an Agency
At their best, agencies act as an extension of your team. What’s theirs becomes yours, meaning you’ll have access to a broad range of talent, skill sets, and resources. Your agency relationship can open doors to:
Multidisciplinary expertise
It’s reasonable to expect your full-time developer to be an expert in coding sites and apps. But what about SEO? Content marketing? UX/UI? Data and analytics? Copywriting?
Large websites, platforms, and applications call for all of these specialized skills – and so many more. That’s a lot of seats to fill and a pretty hefty budget to make the case for. If you hired and managed all of those individuals, you’d spend all your time trying to keep them busy.
With an agency, you get access to all of that expertise on an as-needed or contract basis and someone to manage them for you.
Cutting-edge capabilities
Technology evolves at a breakneck speed. Since internal teams typically just touch their own platforms and technologies, they often have less exposure to new tools and processes than agencies. For most agencies, learning is baked into the culture through dedicated professional development and skills learned through serving a broader range of clients.
Here at Oomph, we know part of our value is advising on the emerging technologies that might benefit your business. That’s why we create intentional spaces, like our monthly engineering guild, for our teams to explore and discuss new tools. The knowledge-sharing that agencies like ours engage in trickles down not only to their conversations with you, but into the projects and products they deliver.
Continuity
Imagine you’re in the middle of building a new digital platform. What if your sole developer leaves, as so many employees do?
On average, companies lose 18% of their workforce every year to turnover, 12% of which is voluntary. While this rate varies from industry to industry, it’s still likely that you’ll one day lose team members to the draw of higher salaries and better benefits. Agencies offer a level of consistency that FTEs just don’t, backfilling any departures to keep your initiatives humming along.
Agency vs. In-House: Which Is More Cost Effective?
While it’s true that you’ll likely pay more for an hour of your agency’s time than an hour of your FTE’s, that doesn’t tell the whole story. Agencies are often a more cost-effective option because:
Full-time salaries are on the rise
According to a 2021 US News Report, software developers made a median salary of $120,730. Have sticker shock yet? Keep in mind, that doesn’t even include the additional costs of employment like benefits, PTO, and hardware and software.
Agency time is more efficient
Efficiency is a priority for any agency. They’re typically paid for the number of hours it takes to do a project – no more, no less – so they’re incentivized to make every minute count.
A FTE may not be so enterprising with your time. Not to mention that with FTEs, you also pay for:
- Time to onboard/ramp up
- Time spent on professional development, internal meetings, and other activities outside of their core work
- Time spent by managers/others to manage the employee, which is generally a higher time investment than managing your agency
The relationship can scale up or down
Imagine you’re launching a new website. To get it across the finish line, you need a wide variety of team members and a huge chunk of hours. But what happens after that website goes live?
With an agency, you can easily scale your engagement up or down to account for the ebbs and flows of digital projects. For example, you might hire an agency to provide a basic retainer package for post-launch site maintenance, and then add new features as you need them via specific scopes of work. In many cases, the cost of an agency support package could be as much as half the cost of hiring just one person full-time.
When To Hire an Agency
We have to say it: There are some situations where only an agency will do.
Now, we aren’t saying that agency has to be Oomph (although we’re always here to help if you need us). But we are saying that agencies may be the best fit if:
- Development isn’t a core capability of your business: Businesses that lack a deep knowledge of web development may struggle to effectively manage an in-house developer, or even worse, end up with technical debt they’re unaware of.
- You have a specific project to complete: Big projects are a great reason to work with an agency because you can essentially expand your team for a limited time, then scale back once the project wraps up.
- Your needs fluctuate or your team is maxed: Some months, you’ll have a surplus of development projects and your team will feel up to their eyeballs in to-dos. Other months, those projects slow down. A support package with an agency can flex along with your business’s needs, giving you the option to add more hours during busy times. While leveraging freelancers may sound appealing here, the constant ramp-up periods and lack of institutional knowledge that comes along with using contractors can actually slow work down. Agencies bring a blend of outsider perspective with flexible, ongoing partnership.
- Your needs are multidisciplinary: It rarely makes sense to hire a 10-person team for a specific project. But your agency can offer all the skills you need (and probably even more that you aren’t utilizing yet) without the hassle of managing an entire team or even overseeing multiple freelancers.
The Agency vs. In-House Bottom Line
Here’s the real tea: When it comes time to decide to “build vs. buy,” so to speak, there is no one right answer. There are pros and cons to each approach, and it really does depend on how your team is built now and where you need it to go.
Both approaches can work. And while we’d love for you to partner with Oomph, we also know that the most fruitful agency-client relationships are those where the agency’s capabilities merge seamlessly with the client’s needs. For that reason, we also believe in the best of both worlds – putting our full weight behind projects, but knowing when it’s time to play a supporting role to the FTE main characters.
Need help deciding? Let’s talk about it.
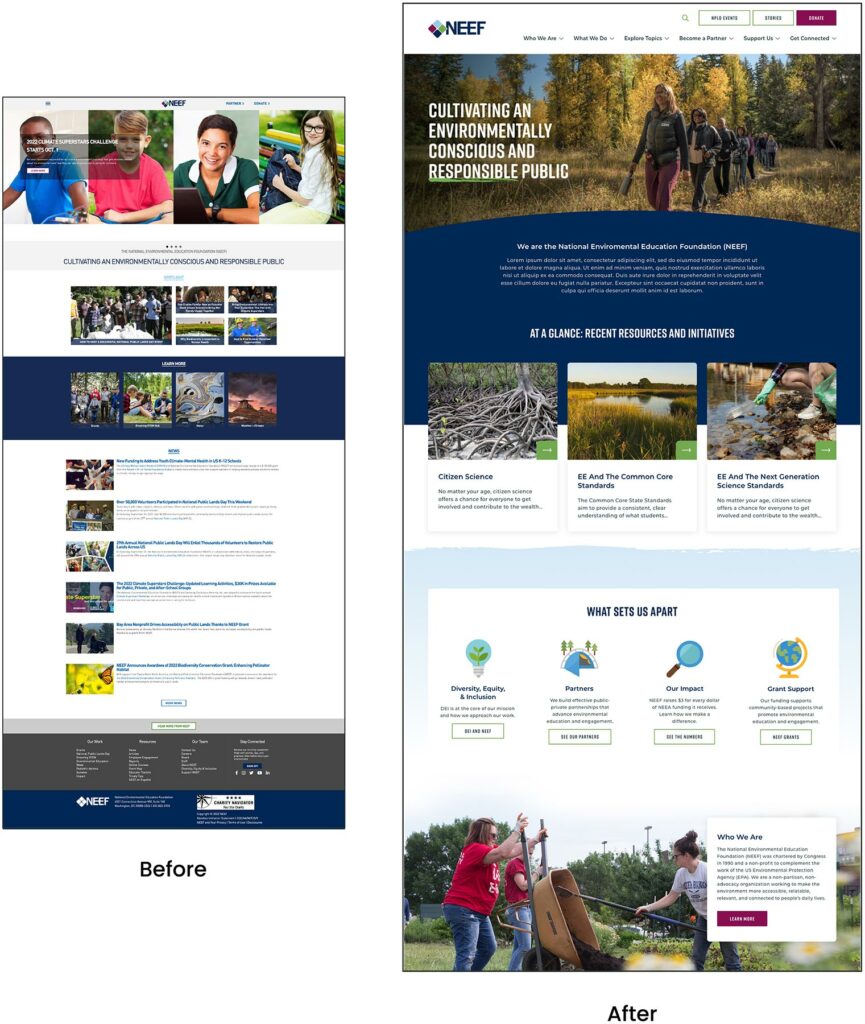
THE BRIEF
Connecting People and Planet
NEEF’s website is the gateway that connects its audiences to a vast array of learning experiences – but its existing platform was falling short. The organization needed more visually interesting resources and content, but it also knew its legacy Drupal site couldn’t keep up.
NEEF wanted to build a more powerful platform that could seamlessly:
- Communicate its mission and showcase its impact to inspire potential funders
- Broaden its audience reach through enhanced accessibility, content, and SEO
- Be a valuable resource by providing useful and engaging content, maps, toolkits, and online courses
- Build relationships by engaging users on the front end with easy-to-use content, then seamlessly channeling that data into back-end functionality for user-based tracking
THE APPROACH
Strategy is the foundation for effective digital experiences and the intuitive designs they require. Oomph first honed in on NEEF’s key goals, then implemented a plan to meet them: leveraging existing features that work, adding critical front- and back-end capabilities, and packaging it all in an engaging, user-centric new website.
Information architecture is at the core of user experience (UX). We focused on organizing NEEF’s information to make it more accessible and appealing to its core audiences: educators, conservationists, nonprofits, and partners. Our designers then transformed that strategy into strategic wireframes and dynamic designs, all of which we developed into a custom Drupal site.
The New NEEF: User-Centered Design
A Custom Site To Fuel Connection
NEEF needed a digital platform as unique as its organization, which is why Oomph ultimately delivered a suite of custom components designed to accommodate a variety of content needs.

Engaging and thoughtful design
NEEF’s new user experience is simple and streamlined. Visual cues aid in wayfinding (all Explore pages follow the same hero structure, for example), while imagery, micro-interactions (such as hover effects) and a bold color palette draw the user in. The UX also emphasizes accessibility and inclusivity; the high contrast between the font colors and the background make the website more readable for people with visual impairments, while people with different skin tones can now see themselves represented in NEEF’s new library of 100 custom icons.
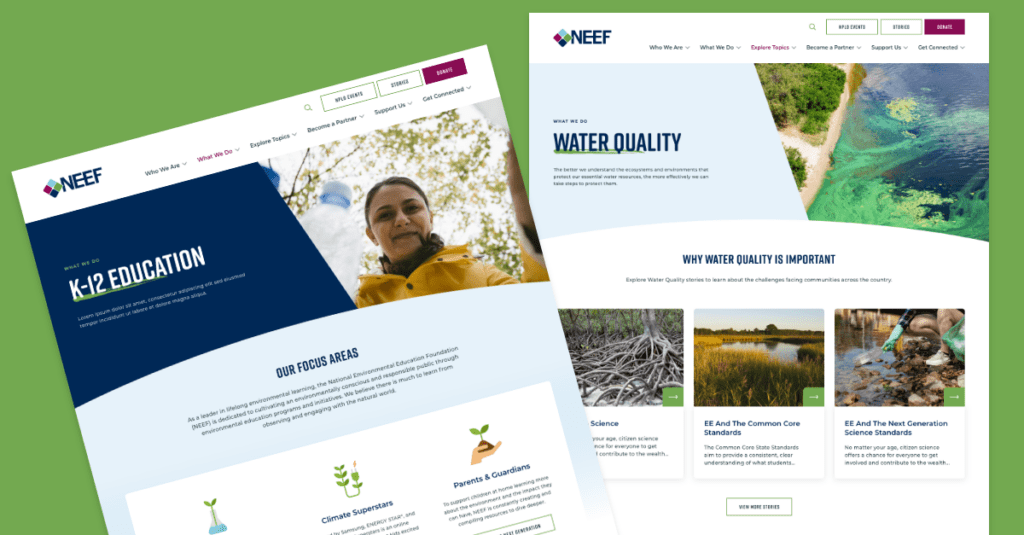
Topic-based browsing
From water conservation to climate change, visitors often come to the NEEF site to learn about a specific subject. We overhauled NEEF’s existing site map to include topic-based browsing, with pages that roll resources, storytelling, and NEEF’s impact into one cohesive package. Additional links in the footer also make it easier for specific audiences to find information, such as nonprofits seeking grants or teachers looking for educational materials.
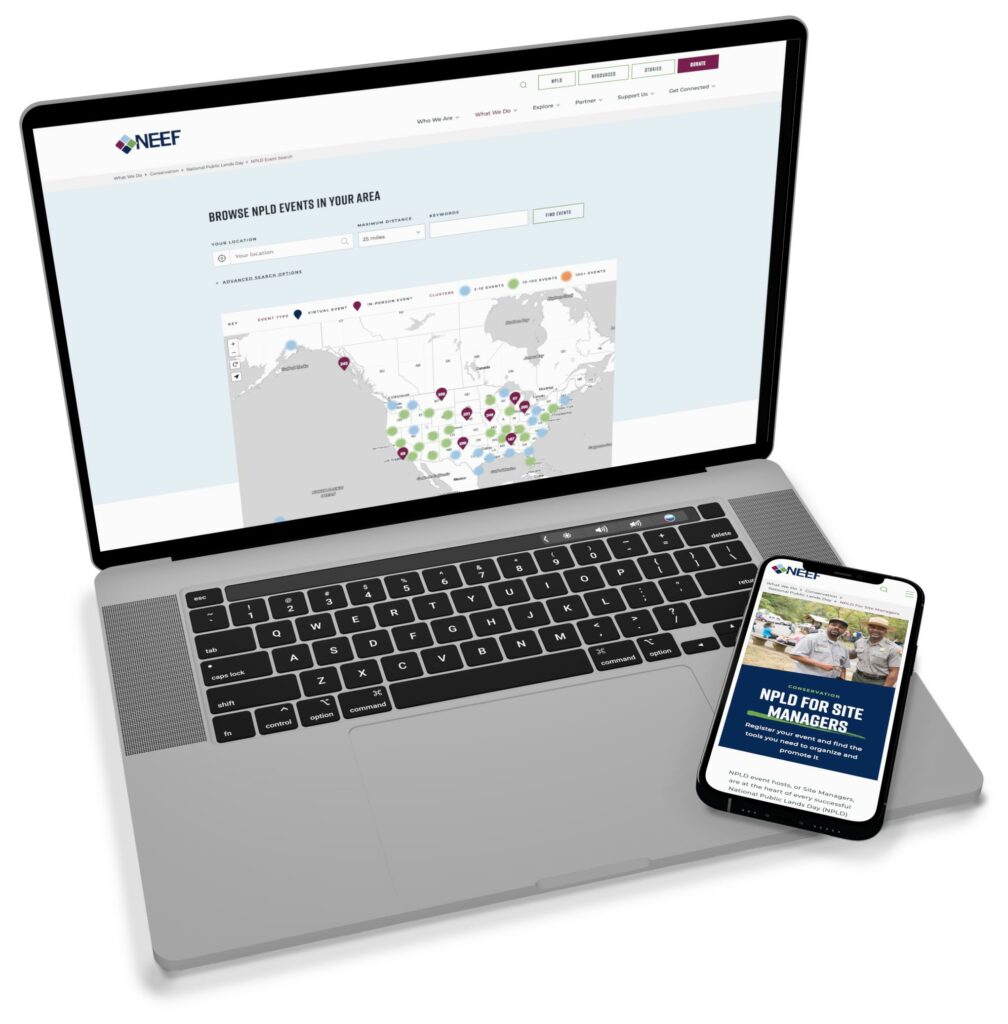
NPLD-hosted resources and event locator
Oomph refreshed existing components and added new ones to support one of NEEF’s flagship programs, National Public Lands Day (NPLD). People interested in hosting an event could use the new components to easily set one up, have their own dashboard to manage, and add their event to NEEF’s event locator. Once the event has passed, it’s automatically unlisted from the locator — but archived so hosts can duplicate and relaunch the event in future years.
THE RESULTS
Protecting the Planet, One User at a Time
Oomph helped NEEF launch its beautiful, engaging, and interactive site in May 2023. Within three months, NEEF’s team had built more than 100 new landing pages using the new component library, furthering its goal to build deeper connections with its audiences.
As NEEF’s digital presence continues to grow, so will its impact — all with the new custom site as its foundation.
With low-code and no-code development tools, anyone can be a developer. Right?

That depends. While working in low-code/no-code tools may feel like you’ve unlocked the power of the digital universe, there are still many projects that require traditional full-code solutions.
According to Zapier’s recent no-code report, over 50% of no-code users started in the past year, many of whom are self-taught. Industry analysts also expect that by 2025, over 70% of the applications organizations develop will rely on no-code/low-code tools. That’s not surprising, given that these tools lower the barrier to entry – and the cost – of developing new sites and apps.
With a slew of effective low-code/no-code solutions on the market today, the question isn’t whether you should use no-code/low-code tools to evolve your digital footprint. It’s how and when you should use them so that the tools work for your organization, not against it.
What Is Low-Code/No-Code?
There are three ways to build websites or apps: full-code, low-code, and no-code. Developers hold the keys to the proverbial full-code city, but low-code and no-code open the door to people without a coding background.
While it’s tempting to brush off low-code and no-code as “same same but different,” the differences do matter. Understanding what they are and how they work will help you choose the best route for whatever digital property you need to build.
Low-code development
Low-code development uses APIs, drag-and-drop tools, code and process templates, and more to help build websites, apps, and workflows. These tools typically require some coding skills, but nothing like what you’d need to create a full-code solution. That makes it much quicker and easier to create a product using low-code development than writing all of the code from scratch.
No-code development
No-code development uses visual builders and other simple tools that allow people without any coding skills to build digital experiences. Through drag-and-drop, visual flows, and templated plug-ins, you can build something beautiful without having to touch the code at all. They’re one step more accessible than low-code solutions, making them compelling options for organizations that need fast and cost-effective development.
Pros and Cons of Low-Code/No-Code Development
Low-code/no-code tools take a lot of the time, cost, and aggravation out of traditional development – but they’re not a cure-all for your coding challenges. Before you dive in, keep their strengths and limitations in mind.
Pros of low-code/no-code
- Speed to market: Your path to launch is much quicker with low-code/no-code tools. Stand up a simple brochure-style website or multi-step workflow in a matter of hours, rather than weeks or even months.
- Less expensive: Many businesses are on a budget that can’t flex for an experienced developer. Both low-code and no-code tools can deliver an effective product at a fraction of the price. Once you’ve built your site, you can also rely on your internal team to tweak the copy or update an image down the road instead of hiring outside help.
- Expansive options: The low-code/no-code tools on the market have expanded along with their user base. There are more options than ever before, with themes and plug-ins that look so sleek you’d think they were full code.
Cons of low-code/no-code
- Limited customization: You can create something appealing with no-code/low-code options. But will it totally look and feel like your brand? Probably not. Because these tools are designed to be easy to use, they don’t have the custom capabilities you’ll get through coding.
- Somewhat breakable: Low-code/no-code tools do use code, it’s just written and templated by someone else. That means that if you don’t use the features correctly, you can break the code – and you might still have to call in a developer to make important fixes.
- Time intensive: Drag-and-drop may sound simple, but getting it just right can actually be a time suck for people with minimal web dev skills. You may end up spending more time on your site or app than if you hired someone with development experience.
When Should You Use Low-Code/No-Code Tools?
For simple projects where hitting budgets and timelines is more important than highly customized design, low-code/no-code tools can be a great solve. They’re especially good for:
- Proof-of-concept builds: Looking to stand up a site or app for a new product? Rather than spending months on traditional development (and losing precious time in the market), low-code/no-code tools allow you to build the core functionality, test your idea with users, and gain buy-in or funding from key decision-makers. If you pick the right tool, your MVP could even serve as the foundation for a larger build later.
- Creating simple websites and apps: For basic builds like customer portals, knowledge centers, or bug ticketing systems, you don’t need to recreate the wheel. Low-code/no-code tools offer tons of templates that make it easy to launch straightforward digital experiences.
- Updating an existing digital experience: Thanks to the bevy of CMS tools out there, you can hire a developer for an initial build and have them set up CMS functionality for simple updates later. This hybrid approach gives you the freedom to adapt your site or app as your organization evolves, while still maintaining a custom look and feel.
- Reporting dashboards and workflow automations: Need a new setup for your business intelligence? Since dashboards and workflows are mainly built for internal users, achieving a custom look isn’t typically a priority – and options abound for automating virtually any task.
What Should You Look For in a Low-Code/No-Code Tool?
Before you choose a solution, consider whether anyone on your team has basic coding skills. If yes, low-code tools may be up your alley. If not, consider narrowing your focus to the many no-code tools around.
Whichever route you go, look for these features in both low-code and no-code tools:
- An extensive marketplace: Because low-code and no-code solutions aren’t very customizable, look for a tool with robust built-in features. You’ll want to be able to choose from a diverse set of additional features, tools, and pre-built APIs that integrate with any tech you need.
- Integration support: You may need custom code solutions here and there. Make sure the low-code or no-code tool you choose will allow you to add extra code.
- Visual builder tools: With these tools, you’ll be able to edit the user interface and not the back end, which is key if you want an approachable no-code/low-code tool. Look for drag-and-drop capabilities that can be used to create things like data workflow mapping or dashboard building. Without that, you may still need someone with development experience.
- Granular permission systems: Your website shouldn’t be an open door. Look for low-code/no-code tools that allow you to restrict access to certain apps and data sets by assigning different permissions to different users (administrators, edit access, view-only, etc.).
When Should You Bring in an Agency To Build a Full-Code Solution?
Sometimes, only a custom or full-code solution will do. The more unique you want your digital property to be, the more likely it is that you’ll need to call in an expert. We also suggest you look for support if:
- You have a complex digital environment: If you need a site with hundreds of pages or a multisite architecture, you’ll probably need a custom solution to get the results you’re looking for.
- You need a custom feature: Low-code/now-code tools aren’t bottomless wells of features and plug-ins. If you need a unique-to-you feature or integration that isn’t readily available, it’s time to call in someone who can build one.
- You need a custom user interface: Cookie-cutter templates won’t work for all brands and products. If you need a specific user interface, you may not be able to achieve that within even a low-code platform.
- You want the product to be proprietary: Low-code/no-code products must be hosted within a specific low-code/no-code platform. You’ll need a custom, full-code solution if you want to own the product and sell it as a proprietary tool.
Get Help Leveraging the Right Tools for the Right Projects
You wouldn’t build a house on shaky ground, would you? Then why build an experience on a platform that might not actually be able to support it?
Though no-code/low-code tools certainly democratize the web development market, they aren’t a silver bullet. If you know that whatever you’re building is simple enough that a no-code/low-code tool and your existing team can support it, we say go for it.
But if you’re even a little uncertain, consider getting an outside opinion on how to lay a strong foundation for your next development project.
Want help deciding whether no-code, low-code, or full-code is best for you? We’d love to talk with you about your needs.
More than two years after Google announced the launch of its powerful new website analytics platform, Google Analytics 4 (GA4), the final countdown to make the switch is on.
GA4 will officially replace Google’s previous analytics platform, Universal Analytics (UA), on July 1, 2023. It’s the first major analytics update from Google since 2012 — and it’s a big deal. As we discussed in a blog post last year, GA4 uses big data and machine learning to provide a next-generation approach to measurement, including:
- Unifying data across multiple websites and apps
- A new focus on events vs. sessions
- Cookieless user tracking
- More personalized and predictive analytics
At Oomph, we’ve learned a thing or two about making the transition seamless while handling GA4 migrations for our clients – including a few platform “gotchas” that are definitely better to know in advance. Before you start your migration, do yourself a favor and explore our GA4 setup guide.
Your 12-Step GA4 Migration Checklist
Step 1: Create a GA4 Analytics Property and Implement Tagging
The Gist: Launch the GA4 setup assistant to create a new GA4 property for your site or app. For sites that already have UA installed, Google is beginning to create GA4 properties automatically for them beginning in March 2023 (unless you opt out). If you’re migrating from UA, you can connect your UA property to your GA4 property to use the existing Google tracking tag on your site. For new sites, you’ll need to add the tag directly to your site or via Google Tag Manager.
The Gotcha: During property setup, Google will ask you which data streams you’d like to add (websites, apps, etc…). This is simple if you’re just tracking one site, but gets more complex for organizations with multiple properties, like educational institutions or retailers with individual locations. While UA allowed you to separate data streams by geography or line of business, GA4 handles this differently. This Google guide can help you choose the ideal configuration for your business model.
Step 2: Update Your Data Retention Settings
The Gist: GA4 lets you control how long you retain data on users and events before it’s automatically deleted from Google’s servers. For user-level data, including conversions, you can hang on to data for up to 14 months. For other event data, you have the option to retain the information for 2 months or 14 months.
The Gotcha: The data retention limits are much shorter than UA, which allowed you to keep Google-signals data for up to 26 months in some cases. The default retention setting in GA4 is 2 months for some types of data – a surprisingly short window, in our opinion – so be sure to extend it to avoid data loss.
Step 3: Initialize BigQuery
The Gist: Have a lot of data to analyze? GA4 integrates with BigQuery, Google’s cloud-based data warehouse, so you can store historical data and run analyses on massive datasets. Google walks you through the steps here.
The Gotcha: Since GA4 has tight time limits on data retention as well as data limits on reporting , skipping this step could compromise your reporting. BigQuery is a helpful workaround for storing, analyzing and visualizing large amounts of complex data.
Step 4: Configure Enhanced Measurements
The Gist: GA4 measures much more than pageviews – you can now track actions like outbound link clicks, scrolls, and engagements with YouTube videos automatically through the platform. When you set up GA4, simply check the box for any metrics you want GA4 to monitor. You can still use Google tags to customize tracking for other types of events or use Google’s Measurement Protocol for advanced tracking.
The Gotcha: If you were previously measuring events through Google tags that GA4 will now measure automatically, take the time to review which ones to keep to avoid duplicating efforts. It may be simpler to use GA4 tracking – giving you a good reason to do that Google Tag Manager cleanup you’ve been meaning to get to.
Step 5: Configure Internal and Developer Traffic Settings
The Gist: To avoid having employees or IT teams cloud your insights, set up filters for internal and developer traffic. You can create up to 10 filters per property.
The Gotcha: Setting up filters for these users is only the first step – you’ll also need to toggle the filter to “Active” for it to take effect (a step that didn’t exist in UA). Make sure to turn yours on for accurate reporting.
Step 6: Migrate Users
The Gist: If you were previously using UA, you’ll need to migrate your users and their permission settings to GA4. Google has a step-by-step guide for migrating users.
The Gotcha: Migrating users is a little more complex than just clicking a button. You’ll need to install the GA4 Migrator from Google Analytics add-on, then decide how to migrate each user from UA. You also have the option to add users manually.
Step 7: Migrate Custom Events
The Gist: Event tracking has fundamentally changed in GA4. While UA offered three default parameters for events (eventcategory, action, and eventlabel), GA4 lets you create any custom conventions you’d like. With more options at your fingertips, it’s a great opportunity to think through your overall measurement approach and which data is truly useful for your business intelligence.
When mapping UA events to GA4, look first to see if GA4 is collecting the data as an enhanced measurement, automatically collected, or recommended event. If not, you can create your own custom event using custom definitions. Google has the details for mapping events.
The Gotcha: Don’t go overboard creating custom definitions – GA4 limits you to 50 per property.
Step 8: Migrate Custom Filters to Insights
The Gist: Custom filters in UA have become Insights in GA4. The platform offers two types of insights: automated insights based on unusual changes or emerging trends, and custom insights based on conditions that matter to you. As you implement GA4, you can set up custom insights for Google to display on your Insights dashboard. Google will also email alerts upon request.
The Gotcha: Similar to custom events, GA4 limits you to 50 custom insights per property.
Step 9: Migrate Your Segments
The Gist: Segments work differently in GA4 than they do in UA. In GA4, you’ll only find segments in Explorations. The good news is you can now set up segments for events, allowing you to segment data based on user behavior as well as more traditional segments like user geography or demographics.
The Gotcha: Each Exploration has a limit of 10 segments. If you’re using a lot of segments currently in UA, you’ll likely need to create individual reports to see data for each segment. While you can also create comparisons in reports for data subsets, those are even more limited at just four comparisons per report.
Step 10: Migrate Your Audiences
The Gist: Just like UA, GA4 allows you to set up audiences to explore trends among specific user groups. To migrate your audiences from one platform to another, you’ll need to manually create each audience in GA4.
The Gotcha: You can create a maximum of 100 audiences for each GA4 property (starting to sense a theme here?). Also, keep in mind that GA4 audiences don’t apply retroactively. While Google will provide information on users in the last 30 days who meet your audience criteria — for example, visitors from California who donated more than $100 — it won’t apply the audience filter to users earlier than that.
Step 11: Migrate Goals to Conversion Events
The Gist: If you were previously tracking goals in UA, you’ll need to migrate them over to GA4, where they’re now called conversion events. GA4 has a goals migration tool that makes this process pretty simple.
The Gotcha: GA4 limits you to 30 custom conversion events per property. If you’re in e-commerce or another industry with complex marketing needs, those 30 conversion events will add up very quickly. With GA4, it will be important to review conversion events regularly and retire ones that aren’t relevant anymore, like conversions for previous campaigns.
Step 12: Migrate Alerts
The Gist: Using custom alerts in UA? As we covered in Step 8, you can now set up custom insights to keep tabs on key changes in user activity. GA4 will deliver alerts through your Insights dashboard or email, based on your preferences.
The Gotcha: This one is actually more of a bonus – GA4 will now evaluate your data hourly, so you can learn about and respond to changes more quickly.
The Future of Measurement Is Here
GA4 is already transforming how brands think about measurement and user insights – and it’s only the beginning. While Google has been tight-lipped about the GA4 roadmap, we can likely expect even more enhancements and capabilities in the not-too-distant future. The sooner you make the transition to GA4, the sooner you’ll have access to a new level of intelligence to shape your digital roadmap and business decisions.
Need a hand getting started? We’re here to help – reach out to book a chat with us.